
“`html
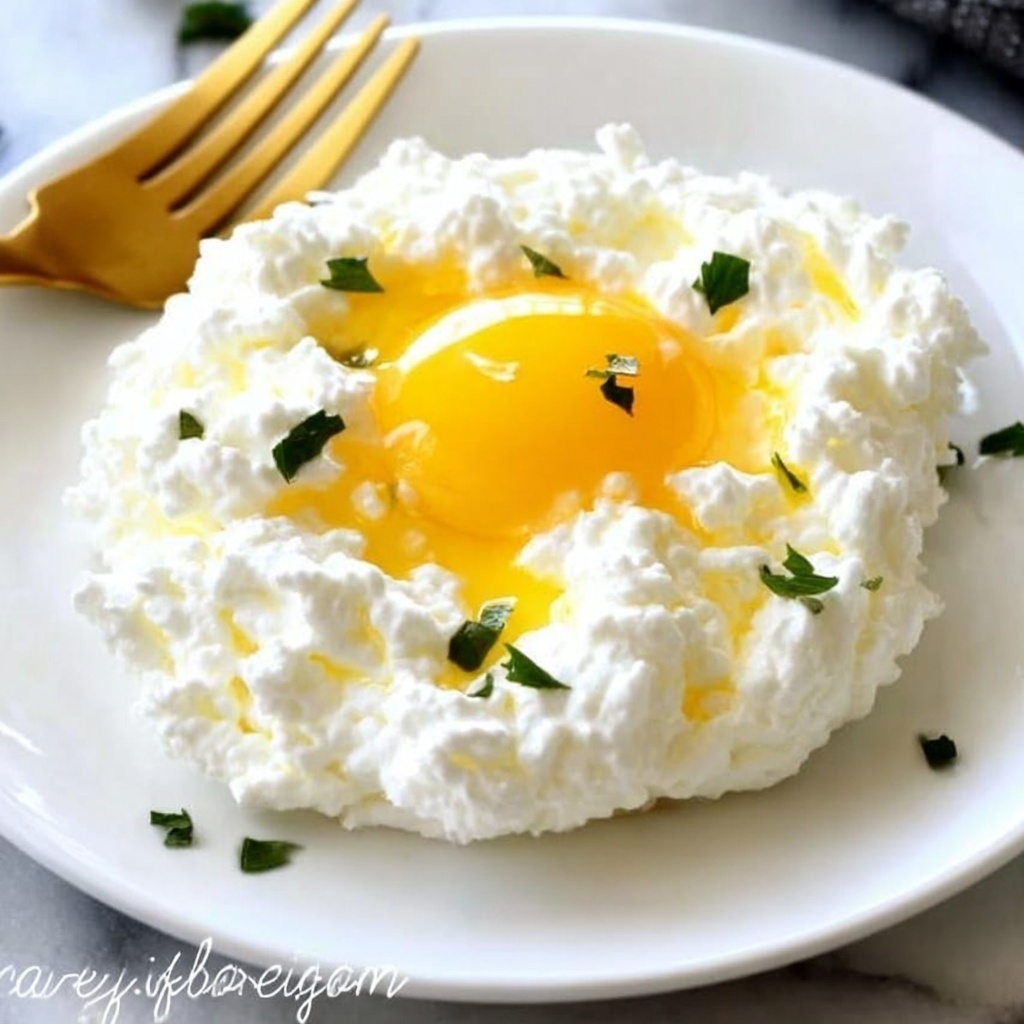
If you’ve ever wanted to elevate your breakfast game with something light, fluffy, and downright delightful, this Cloud Eggs Recipe with Flavor Variations Recipe is the perfect place to start. These airy, golden mounds of whipped egg whites crowned with tender, runny yolks are not only stunning to look at but also wonderfully versatile. Adding delicious flavor twists like ham and Swiss, garlic and Parmesan, or bacon and cheddar makes each bite bursting with savory goodness and guaranteed to impress anyone lucky enough to share your morning table.
Ingredients You’ll Need
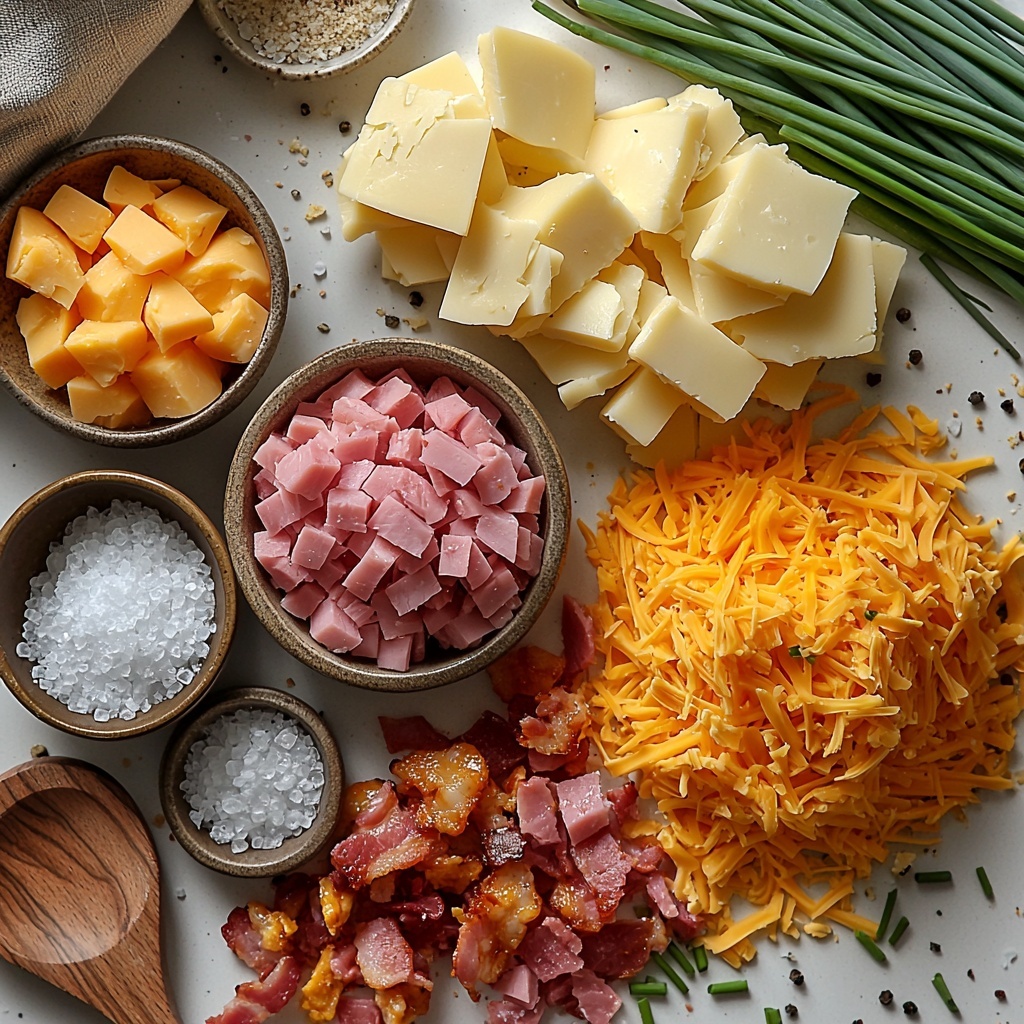
These ingredients are wonderfully straightforward yet essential for crafting those ethereal, cloud-like eggs. Each component plays a role in balancing texture, flavor, and richness, making this dish as simple as it is special.
- 4 large eggs: The star of the dish, providing both fluffy whites and creamy yolks.
- ¼ teaspoon sea salt: Enhances the natural flavors in the egg whites.
- ⅛ teaspoon black pepper: Adds just the right subtle kick.
- ¼ cup diced deli ham: Perfect for the Ham & Swiss variation, offering savory meatiness.
- ½ cup grated Swiss cheese: Melts beautifully to add creamy, nutty depth.
- ½ teaspoon garlic powder: For Garlic & Parmesan, this gives a fragrant, savory boost.
- ½ cup grated Parmesan cheese: Adds a salty, sharp tang that pairs perfectly with garlic.
- ¼ cup crumbled cooked bacon: For Bacon & Cheddar, providing smoky crunch in every bite.
- ½ cup grated cheddar cheese: Adds a rich, sharp melting cheese contrast.
- ½ cup grated Gruyere cheese: The Gruyere & Chives variation brings a slightly sweet, earthy flavor.
- 2 tablespoons chopped chives: Adds bright herbal notes to the cheesy Gruyere cloud eggs.
How to Make Cloud Eggs Recipe with Flavor Variations Recipe
Step 1: Preheat and Prep Your Oven
First things first, get your oven warmed up to 450°F (232°C). This high heat is crucial for creating those lightly golden edges and perfect set on your clouds. Line a baking sheet with parchment paper to prevent sticking and make cleanup a breeze.
Step 2: Separate the Eggs
Now, carefully separate the egg whites from the yolks. Place the whites in a large bowl — this is where the magic happens as we whip them into fluffy clouds. Keep the yolks in small individual bowls or one bowl if you’re confident, so they stay intact for plating later.
Step 3: Whip the Egg Whites to Stiff Peaks
Grab a hand mixer and beat those whites until stiff peaks form. This means when you lift the beaters, the white mixture holds firm shapes without collapsing. This step is what gives the cloud eggs their signature lofty texture!
Step 4: Fold in Seasonings and Flavor Variations
Gently fold in the sea salt and black pepper. Then, if you’re feeling adventurous, add your chosen flavor variation ingredients—like diced ham with Swiss cheese, garlic powder paired with Parmesan, crispy bacon with cheddar, or Gruyere with fresh chives. Folding gently keeps your clouds light and airy.
Step 5: Shape Your Egg Whites and Bake
Spoon the whipped egg whites onto your lined sheet, shaping them into four neat mounds. Use the back of a spoon to create a small well or indentation in the middle of each cloud—that’s where your yolks will nestle later.
Step 6: Bake and Add Yolks
Bake these fluffy clouds for about 3 minutes to start setting the whites. Then carefully add one yolk into each well. Return the tray to the oven for an additional 2-3 minutes until the yolks reach your desired softness—whether you want a runny, custardy center or something a bit firmer.
How to Serve Cloud Eggs Recipe with Flavor Variations Recipe
Garnishes
Simple garnishes like a sprinkle of extra chives, cracked black pepper, or a light dusting of smoked paprika can elevate presentation and flavor. The fresh herb brightness or subtle smoky kiss will make each cloud egg feel even more special on the plate.
Side Dishes
Cloud eggs pair beautifully with crispy toasted bread or buttery croissants for mopping up those luscious yolks. Add a fresh side salad or sautéed greens to balance the richness, or serve alongside roasted tomatoes or avocado slices for a colorful, nutrient-packed breakfast.
Creative Ways to Present
Try serving your cloud eggs perched atop warm English muffins or nestled on top of savory grain bowls for a trendy twist. For brunch guests, consider plating alongside smoked salmon or alongside crispy potatoes for a complete, dazzling meal everyone will rave about.
Make Ahead and Storage
Storing Leftovers
If you happen to have any leftover cloud eggs, store them in an airtight container in the refrigerator. They’ll keep nicely for 3 to 4 days, allowing you to enjoy this elevated breakfast or snack later without losing their airy charm.
Freezing
Because of the delicate texture of whipped egg whites and runny yolks, freezing cloud eggs isn’t recommended. They may lose their beautiful fluffiness and become watery or rubbery once thawed.
Reheating
When you’re ready to enjoy your stored cloud eggs, reheat gently in a low oven (around 275°F or 135°C) for just a few minutes. This method helps preserve their light texture without overcooking the yolks or drying them out, keeping breakfast bliss intact.
FAQs
Can I make cloud eggs without separating the eggs?
Unfortunately, no. The magic of cloud eggs lies in whipping the whites separately to create that airy texture. If the yolks remain mixed in, you won’t be able to achieve those fluffy clouds.
Which cheese works best in the flavor variations?
Each cheese used in the variations brings its own personality: Swiss for nutty smoothness, Parmesan for sharp zest, cheddar for richness, and Gruyere for sweet earthiness. Feel free to explore based on your taste preferences!
How do I keep the yolks from breaking when adding them?
Using a small spoon to gently place each yolk into the well after the egg whites have partially baked helps prevent breakage. Being gentle and deliberate is key here.
Can I make these cloud eggs vegan?
Cloud eggs rely on egg whites for their structure and texture, so vegan versions are tricky. However, experimenting with aquafaba (chickpea water) might be an option if you want to try a plant-based approach, though flavor and texture will differ.
What’s the best way to clean up after making cloud eggs?
Since egg whites can be sticky, soaking your mixing bowls and utensils in warm soapy water right after use will make cleaning easier. Also, parchment-lined sheets save clean-up time in the oven.
Final Thoughts
I can’t recommend enough giving the Cloud Eggs Recipe with Flavor Variations Recipe a try the very next time you want to impress at breakfast or brunch. The lightness, the beautiful presentation, and those mouthwatering flavor combos will make your morning feel extra special. Whether you stick to classic simplicity or mix in your favorite toppings, these cloud eggs are a delightful way to start the day with style and smile-worthy taste.
“`
Print
Cloud Eggs Recipe with Flavor Variations Recipe
- Prep Time: 10 minutes
- Cook Time: 5-6 minutes
- Total Time: 15-16 minutes
- Yield: 4 servings
- Category: Breakfast
- Method: Baking
- Cuisine: American
Description
Cloud Eggs are a whimsical and delightful way to enjoy eggs, featuring fluffy whipped egg whites baked with a creamy yolk center. This recipe offers several delicious variations with flavorful toppings like ham and Swiss cheese, garlic and Parmesan, bacon and cheddar, or Gruyere and chives. Perfect for a light breakfast or brunch, these eggs are quick to make and visually impressive.
Ingredients
Basic Ingredients
- 4 large eggs
- ¼ teaspoon sea salt
- ⅛ teaspoon black pepper
Ham & Swiss Variation
- ¼ cup diced deli ham
- ½ cup grated Swiss cheese
Garlic & Parmesan Variation
- ½ teaspoon garlic powder
- ½ cup grated Parmesan cheese
Bacon & Cheddar Variation
- ¼ cup crumbled cooked bacon
- ½ cup grated cheddar cheese
Gruyere & Chives Variation
- ½ cup grated Gruyere cheese
- 2 tablespoons chopped chives
Instructions
- Preheat and Prep: Preheat your oven to 450°F (232°C). Line a baking sheet with parchment paper to prevent sticking and allow easy cleanup.
- Separate Eggs: Carefully separate the egg whites from the yolks. Place the whites in a large bowl and place each yolk in a small individual bowl or together in one bowl if you’re confident handling them carefully.
- Whip Egg Whites: Using a hand mixer, beat the egg whites until they reach stiff peaks. This means the whites should hold their shape firmly when the beaters are lifted.
- Fold in Seasonings and Toppings: Gently fold sea salt, black pepper, and your choice of flavor variation ingredients into the whipped egg whites without deflating them.
- Create Clouds: Spoon the fluffy egg white mixture onto the prepared baking sheet, forming four mounds. Use the back of your spoon to create small wells in the center of each mound for the yolks.
- Bake Whites: Place the baking sheet in the oven and bake the egg white mounds for 3 minutes to set slightly.
- Add Yolks and Finish Baking: Carefully place one egg yolk into each well formed in the baked whites. Return the baking sheet to the oven and bake for another 2-3 minutes, or until the yolks are cooked to your preferred doneness.
Notes
- For best results, use very fresh eggs as they separate better and whip more easily.
- Be gentle while folding in seasonings and toppings to keep the whites fluffy.
- You can customize toppings to suit your taste or dietary preferences.
- Watch the eggs closely during the final bake to prevent overcooking the yolks if you like them runny.
- Serve immediately for the best texture and flavor.

