
“`html
There is something undeniably magical about biting into a glossy, perfectly coated treat that combines crisp, juicy apples with a luscious candy shell. This Candy Apple Bags Recipe brings that classic charm straight to your kitchen in a way that feels both festive and approachable. Whether you choose a tart Granny Smith, a sweet Honeycrisp, or a crisp Fuji apple, this recipe promises a harmonious blend of fresh fruit and shimmering candy goodness that’s perfect for any celebration or simple afternoon indulgence.
Ingredients You’ll Need
The magic of this Candy Apple Bags Recipe starts with a handful of simple, essential ingredients. Each one plays a crucial role in creating the perfect balance of flavor, texture, and appearance that makes these candy apples so irresistible.
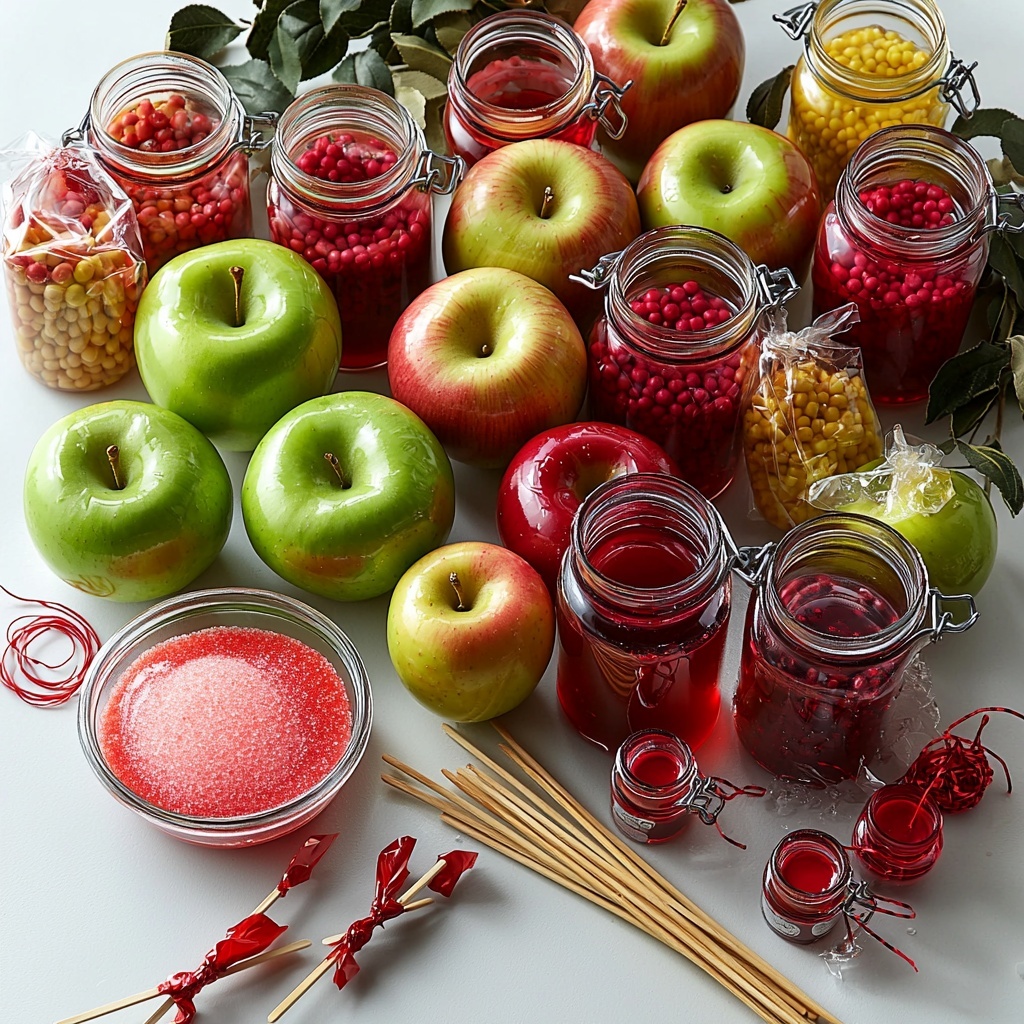
- Crisp, sweet apples: Choose Granny Smith, Honeycrisp, or Fuji for a firm texture that holds up well to dipping and offers a delightful sweetness or tartness.
- Candy coating: Use a store-bought kit for convenience or make your own with sugar, water, corn syrup, and red food coloring for a classic glossy finish.
- Wooden skewers or popsicle sticks: These make dipping and handling easier while giving your candy apples a fun, festive look.
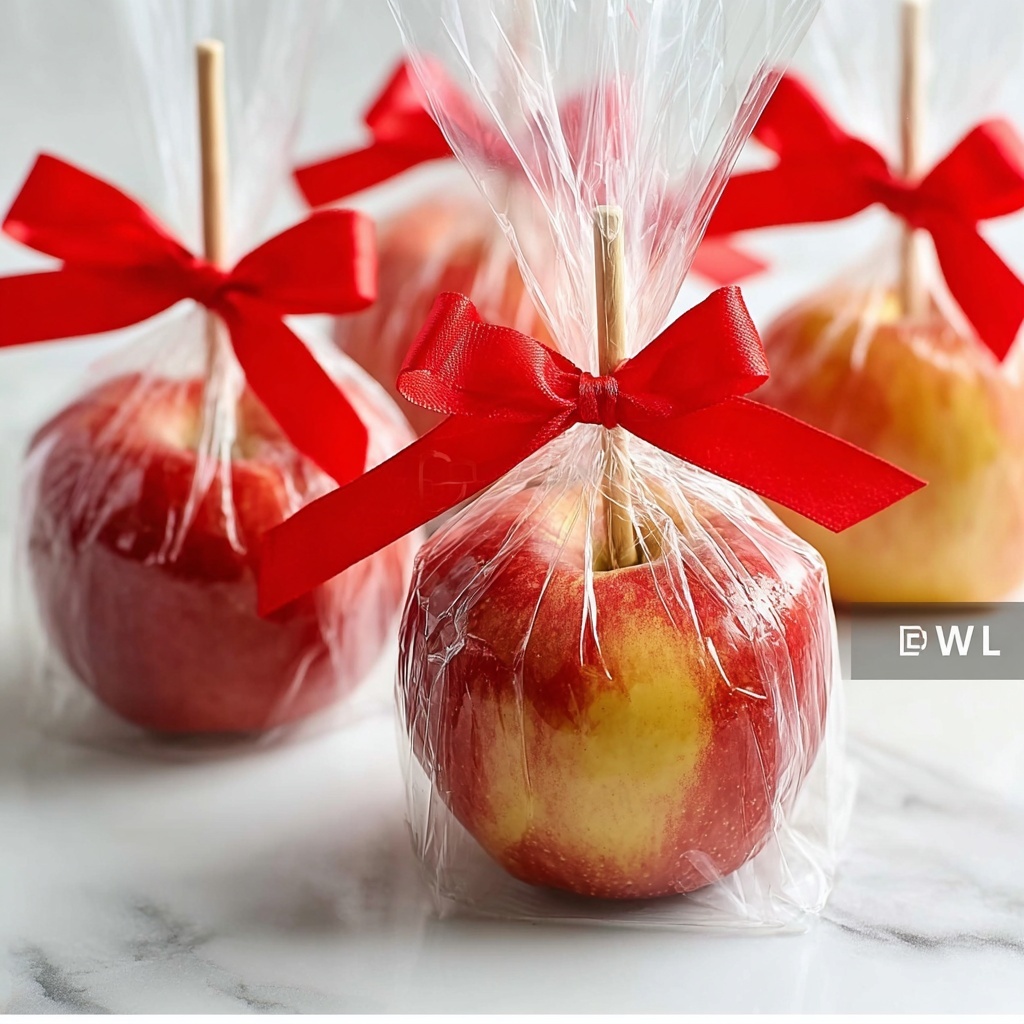
- Candy apple bags: Essential for wrapping and presenting your masterpieces attractively while protecting the candy shell.
- Twist ties, ribbons, or decorative string: Perfect for securing the bags and adding a personal, charming touch.
How to Make Candy Apple Bags Recipe
Step 1: Prepare the Apples
Begin by washing your apples thoroughly — you want to remove any wax coating so the candy adheres perfectly. Dry them completely, then firmly insert a wooden skewer or popsicle stick straight into the top through the stem area. This setup makes dipping and turning effortless and keeps your hands clean.
Step 2: Make the Candy Coating
If you’re going the homemade route, combine sugar, water, and corn syrup in a medium saucepan. Bring this mixture to a boil, watching carefully as it reaches the “hard crack” stage at 300°F — this ensures a crisp, crackly candy shell. Add a splash of red food coloring for that iconic bright candy apple look. Store-bought kits offer a great shortcut if you’re pressed for time but still want that shiny, sweet coating.
Step 3: Dip the Apples
Once your candy mixture is heated perfectly, dip each apple carefully into the coating. Twirl the apple as you lift it out so the candy covers evenly and forms a beautiful, smooth shell around the fruit. Place the dipped apples on parchment paper and let them cool and set completely. This step is crucial for that signature glossy finish and satisfying crunch.
Step 4: Wrap the Candy Apples
After your candy coating has fully hardened, slide each apple carefully into a candy apple bag. This not only helps keep the candy crisp but also makes them easy to handle and share. Secure the bags with twist ties, ribbons, or decorative strings — this little detail adds both practicality and a festive flourish.
Step 5: Personalize and Decorate
Get creative here! Add tags, stickers, or little note cards to your wrapped Candy Apple Bags Recipe creations. It’s a wonderful way to make these treats feel tailored to any occasion — from holiday gatherings to birthday parties or just as a delightful homemade gift.
How to Serve Candy Apple Bags Recipe
Garnishes
While the candy shell itself is flavorful and visually appealing, adding a sprinkle of crushed nuts, a drizzle of white chocolate, or even edible glitter before the coating sets can elevate these candy apples to show-stopping status. These garnishes not only add texture but also provide eye-catching contrast.
Side Dishes
Candy apples are wonderfully sweet and substantial on their own, but pairing them with offerings like vanilla bean ice cream, a tangy caramel dip, or salted nuts can provide a brilliant balance of flavors. These sides complement the crunchy, sweet exterior and juicy apple inside perfectly.
Creative Ways to Present
Present your Candy Apple Bags Recipe with style by arranging them in festive baskets, mason jars, or on tiered dessert stands. For gatherings, consider setting up a DIY candy apple dipping bar where guests can add their own toppings before placing the apples into bags. It’s interactive, fun, and guaranteed to be a crowd-pleaser.
Make Ahead and Storage
Storing Leftovers
Store your wrapped candy apples at room temperature in a cool, dry place. They’ll keep their crunch and freshness for 3 to 4 days. Avoid refrigeration, as moisture can cause the candy shell to become sticky or soft.
Freezing
Freezing candy apples is not recommended because the condensation during thawing tends to ruin the candy shell’s crispy texture. For the best experience, enjoy them fresh within the storage timeframe.
Reheating
The candy coating on these apples isn’t designed for reheating. If the candy shell loses its crunch, it’s best to enjoy the apples raw or transform them into a fun topping for desserts rather than attempting to restore the candy coating.
FAQs
Can I use any type of apple for this recipe?
While you can technically use any apple, firm and crisp varieties like Granny Smith, Honeycrisp, or Fuji work best because they hold up well under the candy coating and provide a pleasant contrast to the sweet shell.
How do I know when the candy coating reaches the right temperature?
Using a candy thermometer is key — you want the mixture to reach the hard crack stage at 300°F. This ensures the coating sets with that perfect crisp crack when bitten.
Is it necessary to dry the apples completely before dipping?
Absolutely! Any moisture on the apples can prevent the candy from sticking properly, leading to a patchy coating or premature melting of the candy shell.
Can I make the candy coating ahead of time?
The candy coating is best used fresh while warm and fluid. If it hardens, reuse can be tricky because reheating risks burning. It’s best to prepare it right before dipping.
How long do Candy Apple Bags stay fresh?
When stored in candy apple bags at room temperature away from humidity, they stay delicious and crisp for 3 to 4 days, which makes them perfect for parties or gifting.
Final Thoughts
There is something truly joyful about making and sharing candy apples wrapped up beautifully in Candy Apple Bags Recipe. The combination of crisp apples and glossy candy gives a nostalgic, festive vibe that’s hard to resist. Give this deliciously fun recipe a try — you’ll be amazed at how simple ingredients and a little bit of love can create something so special that everyone will want to reach for another bite!
“`
Print
Candy Apple Bags Recipe
- Prep Time: 10 minutes
- Cook Time: 20 minutes
- Total Time: 30 minutes
- Yield: 6 candy apples
- Category: Dessert
- Method: Stovetop
- Cuisine: American
Description
This recipe guides you through making the best candy apple bags with crisp, sweet apples coated in a glossy, homemade or store-bought candy coating. Perfect for festive occasions or gifting, these candy apples are beautifully wrapped in clear bags and secured with decorative ties for a delightful presentation.
Ingredients
Apples
- 6 crisp, sweet apples (Granny Smith, Honeycrisp, or Fuji)
Candy Coating (Homemade)
- 2 cups granulated sugar
- 1/2 cup water
- 1/2 cup light corn syrup
- Red food coloring, a few drops
Other
- 6 wooden skewers or popsicle sticks
- 6 candy apple bags (clear plastic bags)
- Twist ties, ribbons, or decorative string to secure the bags
Instructions
- Prepare the Apples: Wash and dry the apples thoroughly, ensuring to remove any wax coating for better candy adherence. Firmly insert wooden skewers or popsicle sticks into the top center of each apple for easy handling.
- Make the Candy Coating: If using a store-bought candy apple kit, follow the package instructions closely. For homemade candy coating, combine granulated sugar, water, and corn syrup in a medium saucepan. Heat over medium heat, stirring until sugar dissolves, then bring to a boil without stirring until the mixture reaches the hard crack stage (300°F) on a candy thermometer. Remove from heat and quickly stir in red food coloring for the signature candy apple color.
- Dip the Apples: Working quickly, dip each apple into the hot candy mixture, twisting to coat the apple evenly. Allow excess candy to drip off before placing the coated apple on parchment paper to cool and harden completely.
- Wrap the Candy Apples: Once the candy coating has fully set and hardened, slide each apple into a candy apple bag. Secure the top of the bag with twist ties, ribbons, or decorative string to keep the apple fresh and create an attractive presentation.
- Decorate: Personalize the wrapped candy apples by adding tags, stickers, or festive decorations to enhance their appeal for gifting or celebrations.
Notes
- Make sure apples are completely dry before dipping to help the candy coating stick properly.
- Use a candy thermometer to ensure the mixture reaches the hard crack stage (300°F) for the perfect glossy, hard candy shell.
- If your candy coating hardens too quickly, gently warm it again over low heat while stirring.
- For easier removal from the pan, use parchment paper or a silicone baking mat under the apples while they cool.
- Customize by using different food coloring or adding edible glitter for unique looks.

