
“`html
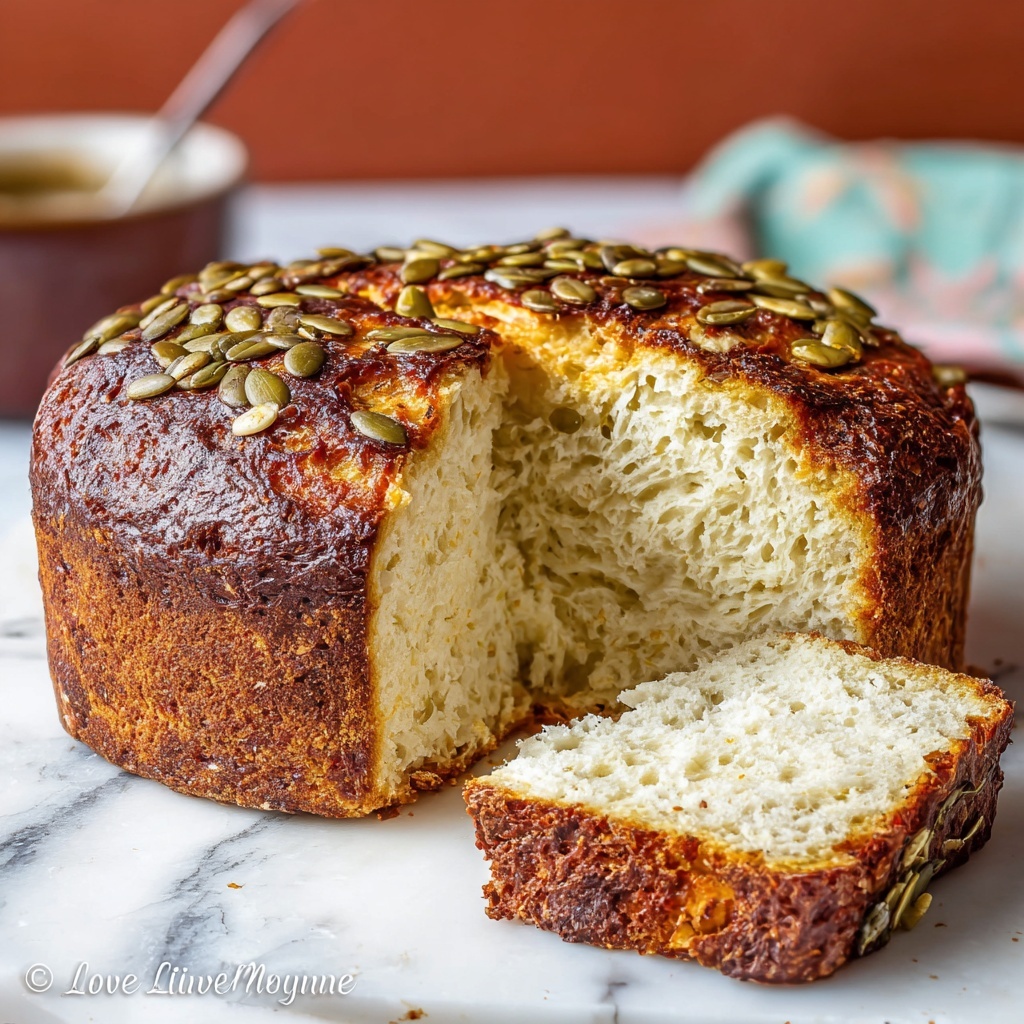
If you’ve ever thought gluten free bread had to be bland or crumbly, let me introduce you to the game-changer: Gluten Free Seeded Bread: 7 Steps to Irresistible Flavor Recipe. This loaf is packed with wholesome seeds that bring in crunchy bursts and a nutty depth, while being soft and tender inside. It’s a joy to bake, easy to customize, and perfect whether you’re gluten intolerant or simply craving something wholesome and tasty to elevate your sandwich or toast game.
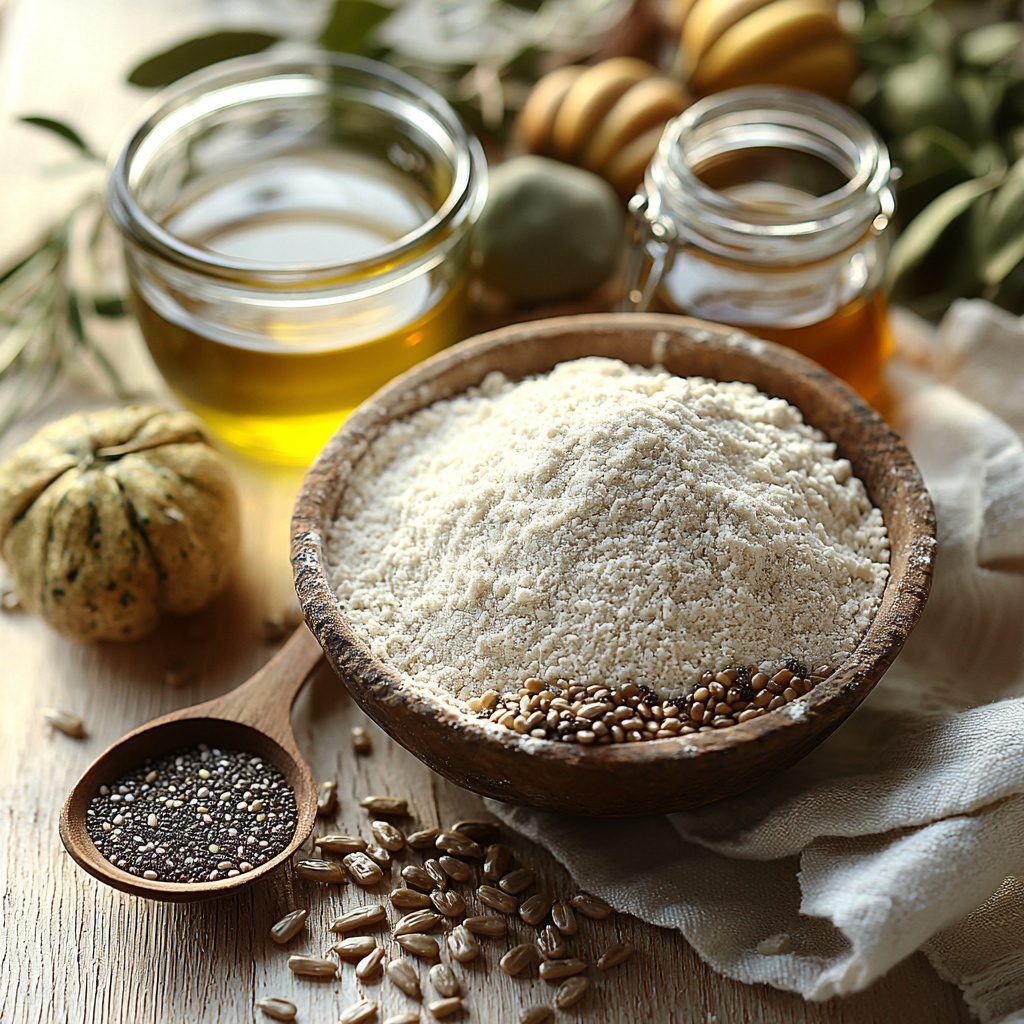
Ingredients You’ll Need
The beauty of this recipe is in its simplicity. Every ingredient plays an essential role, combining to create a loaf that’s moist yet structured, subtly sweet, and loaded with delightful crunch from the seeds.
- 2 cups gluten free all-purpose flour: The foundation for your bread; be sure it has xanthan gum for best texture.
- 1 cup warm water: Activates the yeast and hydrates the flour perfectly for a soft crumb.
- 1/4 cup sunflower seeds: Adds a mild nutty flavor and lovely crunch.
- 1/4 cup pumpkin seeds: Brings vibrant green specks and a boost of nutrients.
- 1/4 cup chia seeds: These little powerhouses help bind the bread while adding texture.
- 2 tablespoons olive oil: Gives the loaf a tender crumb and subtle richness.
- 1 tablespoon honey: Delivers a gentle sweetness that balances the seeds and salt.
- 1 teaspoon salt: Brings out all the flavors and enhances the sweetness.
- 1 tablespoon active dry yeast: The magic ingredient that makes the bread rise beautifully.
How to Make Gluten Free Seeded Bread: 7 Steps to Irresistible Flavor Recipe
Step 1: Preheat the Oven
Start by setting your oven to 350°F (175°C). Preheating is crucial to ensure your bread bakes evenly, developing that irresistible golden crust.
Step 2: Activate the Yeast
In a mixing bowl, combine warm water and active dry yeast, then let it rest for 5 minutes. This wake-up call kickstarts the yeast’s activity, guaranteeing your bread will rise perfectly.
Step 3: Mix Wet Ingredients
Add olive oil, honey, and salt to the yeast mixture. This blend not only adds flavor but also helps create a tender crumb and a slight sweetness that balances the seeds’ earthiness.
Step 4: Combine Dry Ingredients
In a separate bowl, stir together the gluten free flour and all three seeds: sunflower, pumpkin, and chia. Each seed introduces unique texture and taste, creating layers of flavor.
Step 5: Blend Wet and Dry Mixtures
Gradually pour the wet ingredients into the flour and seed mixture. Stir gently until all ingredients are fully incorporated, forming a thick batter that is ready to rise.
Step 6: Prepare to Rise
Transfer the batter into a greased loaf pan. The grease prevents sticking and helps the crust bake to perfection. Let the dough relax and rise for 30 minutes so it can get nice and airy.
Step 7: Bake to Golden Perfection
Bake the bread for 40 minutes, until the top is beautifully golden brown. A well-baked loaf signals a crusty exterior with a soft, flavorful inside. Let it cool before slicing to allow the moisture to settle for clean slices.
How to Serve Gluten Free Seeded Bread: 7 Steps to Irresistible Flavor Recipe
Garnishes
One of the simplest ways to elevate your seeded bread is to brush the crust with a little olive oil or melted butter immediately after baking, then sprinkle extra seeds on top. This adds shine and an even crunchier texture that’s just delightful.
Side Dishes
This bread pairs wonderfully with creamy soups like tomato bisque or butternut squash. It’s also fantastic alongside hearty salads or topped with avocado and a sprinkle of chili flakes for a fresh snack.
Creative Ways to Present
Turn slices into delectable crostini with olive oil and herbs, or toast and use as a base for open-faced sandwiches with smoked salmon, fresh greens, or your favorite cheese. The nutty seeds offer an elegant touch that impresses at brunch or dinner.
Make Ahead and Storage
Storing Leftovers
Once cooled completely, wrap your leftover sliced bread tightly in plastic wrap or store in an airtight container. It will keep fresh and tasty for 3 to 4 days at room temperature, perfect for a few days of breakfasts or snacks.
Freezing
If you want to enjoy this bread later, freeze it for up to 3 months. Slice first and wrap individual slices or the whole loaf tightly with foil and a freezer bag to protect against freezer burn and maintain freshness.
Reheating
To refresh frozen bread, toast slices directly or warm the whole loaf in a 350°F oven wrapped in foil for about 10 to 15 minutes. This brings back that fresh-baked softness and crunch, making every bite just as inviting as day one.
FAQs
Can I substitute other seeds for the ones listed?
Absolutely! Feel free to experiment with sesame, flax, or hemp seeds. Just keep the total seed quantity the same to maintain the bread’s texture and flavor balance.
Does this recipe work with a gluten free flour blend without xanthan gum?
It’s best to use a blend that contains xanthan gum or add about 1/2 teaspoon yourself to ensure the bread holds together well and has a good crumb structure.
Is honey essential in this recipe?
The honey adds mild sweetness and helps feed the yeast for rising. You can substitute with maple syrup or agave nectar if preferred, but I wouldn’t skip it entirely.
Can I make this bread dairy free?
Yes! This recipe is naturally dairy free, thanks to the use of olive oil as the fat. Just be sure your gluten free flour blend aligns with your dietary needs.
How do I know when the bread is fully baked?
The crust should be golden brown. You can also gently tap the bottom of the loaf—if it sounds hollow, it’s done. A kitchen thermometer reading around 200°F internal temperature is also a great indicator.
Final Thoughts
Baking your own gluten free bread can feel like a sweet victory, especially when it’s this delicious and packed with seeds that delight every bite. I encourage you to try the Gluten Free Seeded Bread: 7 Steps to Irresistible Flavor Recipe soon — it’s a wonderful way to bring fresh, wholesome flavor into your kitchen with ease and confidence.
“`
Print
Gluten Free Seeded Bread: 7 Steps to Irresistible Flavor Recipe
- Prep Time: 15 minutes
- Cook Time: 40 minutes
- Total Time: 55 minutes
- Yield: 1 loaf (about 8 slices)
- Category: Bread
- Method: Baking
- Cuisine: Gluten Free
- Diet: Gluten Free
Description
This Gluten Free Seeded Bread recipe offers a delicious and nutritious loaf packed with sunflower, pumpkin, and chia seeds. Perfectly chewy and flavorful, it’s a wholesome choice for those avoiding gluten but still craving a hearty, homemade bread.
Ingredients
Dry Ingredients
- 2 cups gluten free all-purpose flour
- 1 teaspoon salt
- 1 tablespoon active dry yeast
- 1/4 cup sunflower seeds
- 1/4 cup pumpkin seeds
- 1/4 cup chia seeds
Wet Ingredients
- 1 cup warm water
- 2 tablespoons olive oil
- 1 tablespoon honey
Instructions
- Preheat the oven: Start by preheating your oven to 350°F (175°C) to ensure it is ready for baking once the dough has risen.
- Activate the yeast: In a small bowl, combine the warm water and active dry yeast. Let it sit for 5 minutes until it becomes frothy, indicating the yeast is active.
- Mix wet ingredients: Add the olive oil, honey, and salt to the yeast mixture, stirring gently to blend all together.
- Combine dry ingredients: In a larger bowl, combine the gluten free all-purpose flour along with sunflower seeds, pumpkin seeds, and chia seeds, ensuring even distribution of seeds.
- Mix wet and dry: Gradually pour the wet mixture into the dry ingredients while stirring until a consistent dough forms.
- Prepare for rising: Pour the dough batter into a greased loaf pan to prevent sticking.
- Let dough rise: Allow the dough to rise in a warm spot for about 30 minutes, during which it will slightly puff up.
- Bake the bread: Place the loaf pan in the preheated oven and bake for 40 minutes or until the crust turns golden brown and a toothpick inserted in the center comes out clean.
- Cool before slicing: Remove the bread from the oven and let it cool completely before slicing to ensure a perfect texture.
Notes
- Ensure water is warm, not hot, to activate the yeast properly without killing it.
- You can substitute honey with maple syrup for a vegan option, but this will alter the flavor slightly.
- Allowing the bread to cool completely before slicing prevents it from becoming crumbly.
- Store leftover bread in an airtight container for up to 3 days or freeze for longer storage.


