
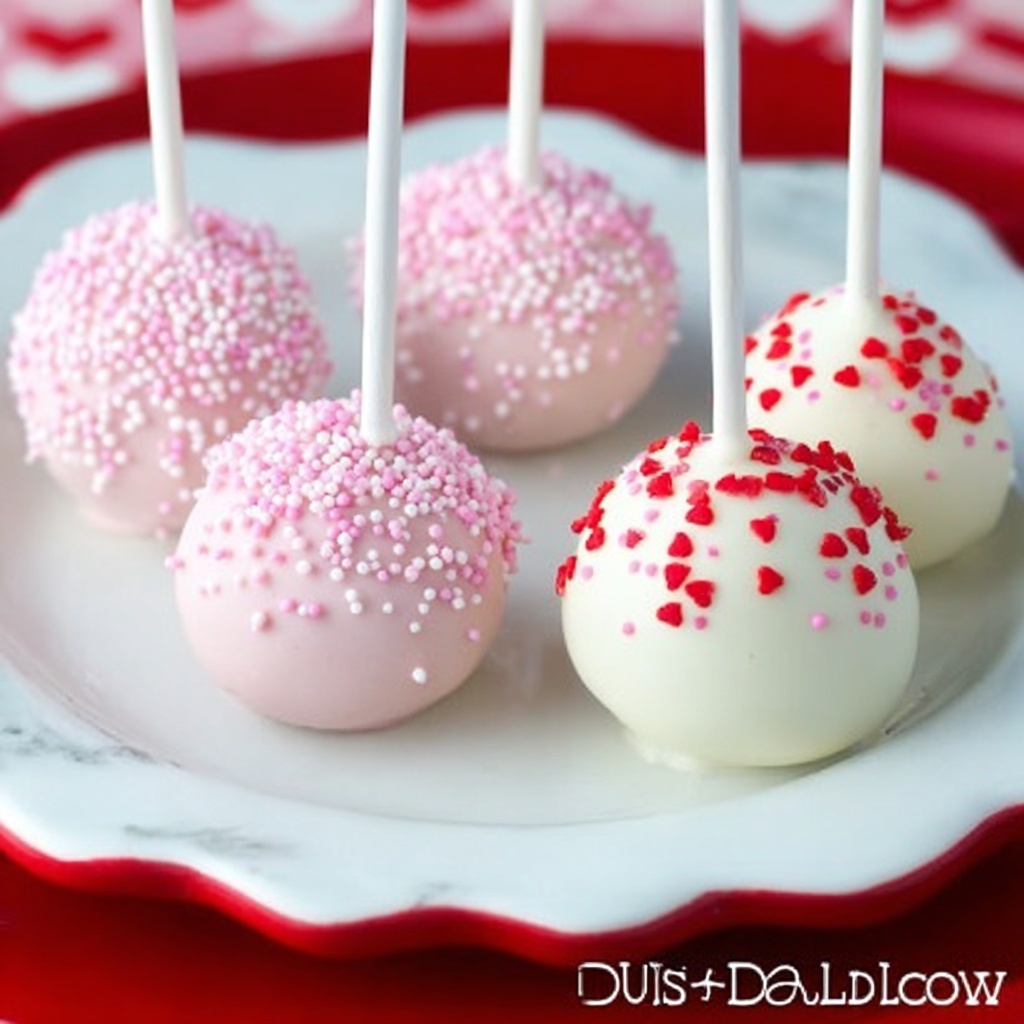
If you have a sweet tooth and love treats that combine fun and flavor, this Strawberry Cake Pops Recipe is an absolute game-changer. Imagine bite-sized bundles of moist strawberry cake, perfectly coated in silky, colorful chocolate, and topped with festive sprinkles that add a delightful crunch and cheer. These cake pops are perfect for parties, gifts, or simply indulging yourself with a classy homemade treat. What makes this recipe so special is how it captures the essence of strawberry in every pop, balancing sweetness, texture, and vibrant presentation all in one delightful bite.
Ingredients You’ll Need
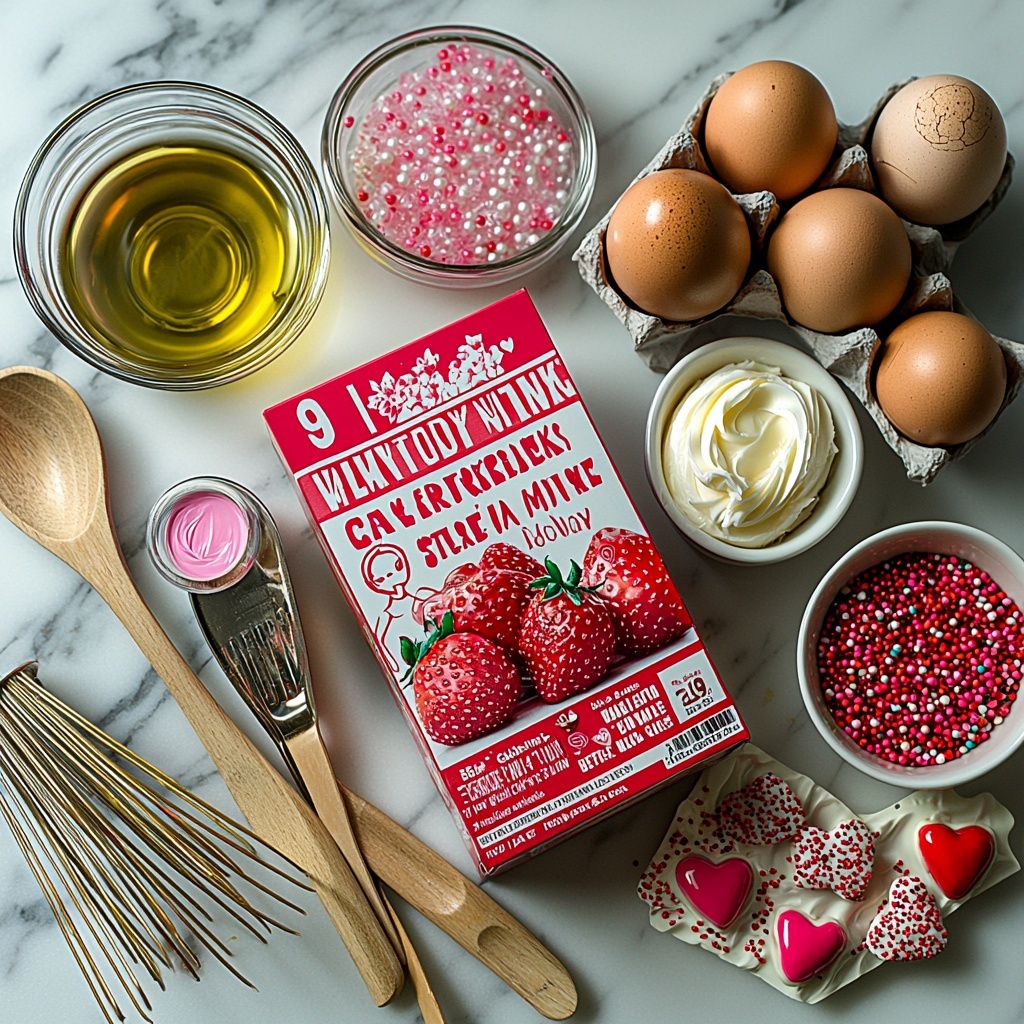
The beauty of this Strawberry Cake Pops Recipe lies in its simplicity. Each ingredient plays a vital role in creating that luscious texture, vibrant color, and rich taste that will have everyone asking for seconds. Here’s what you’ll need to get started:
- 1 package strawberry cake mix: Provides the base flavor and moist crumb of the cake.
- 1 cup water: Necessary to bring the cake mix to life and ensure a moist result.
- 1/2 cup vegetable oil or canola oil: Keeps the cake tender and adds richness.
- 3 large eggs: Binds ingredients together while adding volume and structure.
- 2 tablespoons canned white, vanilla, or cream cheese frosting: Helps the cake crumbs stick together to form perfect pops.
- 20 ounces vanilla melting chocolate or almond bark: Creates the smooth, glossy coating that seals in flavor.
- Pink or red food coloring gel: Used to tint half of the coating for a fun, festive look.
- Valentine’s Day sprinkles: Adds a charming, crunchy finishing touch to the pops.
How to Make Strawberry Cake Pops Recipe
Step 1: Prepare the Cake
Start by preheating your oven as directed on your cake mix package. In a bowl, combine the strawberry cake mix, water, oil, and eggs, mixing until smooth. Pour this vibrant batter into a greased 9×13-inch baking pan and pop it in the oven. Baking the cake just right is crucial because a moist but firm crumb ensures your cake pops hold together perfectly later.
Step 2: Cool the Cake
Once baked, remove the cake from the oven and let it cool completely. This step might seem simple, but it’s a must for ease of handling—warm cake will be sticky and difficult to crumble properly.
Step 3: Crumble the Cake
Now, break the cooled cake into fine crumbs using a fork or your hands. The goal is to get a uniform crumb texture that will mix well with the frosting to form dough balls.
Step 4: Add Frosting and Mix
Add 2 tablespoons of your chosen frosting to the cake crumbs. This helps bind everything together, giving the crumbs a slightly sticky consistency. Mix thoroughly by hand or with a mixer, and if the mixture feels dry, don’t hesitate to add a little more frosting. It’s the secret to forming sturdy cake balls that won’t fall apart.
Step 5: Form Cake Balls
Roll the cake mixture into approximately 1-inch balls, placing each gently on a parchment-lined baking sheet. This size is perfect for the bite-sized treats we’re aiming for.
Step 6: Insert Sticks
Melt a small portion of the almond bark or melting chocolate. Dip the tip of each cake pop stick into the melted chocolate, then insert it halfway into a cake ball. This little trick acts like edible glue, helping the stick stay firmly in place. Pop the entire tray into the refrigerator for 1 hour to firm up nicely.
Step 7: Color the Coating
Melt the remaining almond bark and divide it into two bowls. Add pink or red food coloring gel to one bowl and stir it thoroughly until the color is just right. This step allows you to add visual interest by coating half your cake pops in classic vanilla white and the other half in a vibrant hue.
Step 8: Coat the Cake Pops
Dip each chilled cake pop into the melted chocolate, making sure it’s fully covered. Scrape off the excess chocolate against the bowl edge to avoid drips. Place the pops upright in a holder or styrofoam block so the coating can set perfectly smooth and firm.
Step 9: Decorate and Chill
Before the coating completely hardens, sprinkle Valentine’s Day sprinkles onto the cake pops for a festive and flavorful finish. Allow them to set completely, then chill until you’re ready to serve these delightful treats.
How to Serve Strawberry Cake Pops Recipe
Garnishes
While Valentine’s Day sprinkles are a classic choice, feel free to get creative with your garnishes. Mini heart-shaped candies, colored sugar crystals, or even a light drizzle of contrasting chocolate can make your cake pops pop visually and flavor-wise. These small additions turn these treats into beautiful, personalized delights perfect for gifting or party displays.
Side Dishes
Strawberry cake pops shine as a sweet finish, so pair them beautifully with light refreshments like a fresh fruit platter, a simple vanilla or green tea latte, or even a chilled glass of sparkling lemonade. These sides offer a refreshing contrast and ensure your taste buds stay excited throughout your gathering.
Creative Ways to Present
For an unforgettable presentation, arrange the cake pops in a decorative vase filled with colored sugar or edible glitter. You can also craft a themed display on a tiered cake stand or stick them into a foam board covered with colored tissue paper matching your event theme. Wrapping each pop individually in clear cellophane tied with a ribbon makes for perfect party favors that guests will adore.
Make Ahead and Storage
Storing Leftovers
To keep your cake pops fresh, store them in an airtight container in the refrigerator. They will maintain their flavor and texture for up to 5 days, making them a great make-ahead option for busy schedules or upcoming celebrations.
Freezing
If you want to stash some cake pops for later, they freeze beautifully. Place them in a single layer on a baking sheet until frozen solid, then transfer to a freezer-safe container or bag. When properly stored, they keep well for up to 2 months without losing their delicious strawberry charm.
Reheating
Because these treats are best enjoyed chilled or at room temperature, reheating isn’t necessary. However, if you prefer, allow frozen cake pops to thaw in the refrigerator before serving to ensure the chocolate coating doesn’t crack and the cake inside remains moist.
FAQs
Can I use homemade strawberry cake instead of a mix?
Absolutely! Using a homemade strawberry cake will add a personal touch to the recipe. Just make sure your cake is moist but firm enough to crumble easily and hold together when mixed with frosting.
What if I don’t have food coloring gel? Can I use liquid food coloring?
Gel coloring is best because it won’t thin your melted chocolate, but if liquid coloring is all you have, use it sparingly. Be aware it might affect the texture of the coating slightly.
How long do these cake pops stay fresh at room temperature?
For optimal freshness and safety, keep cake pops refrigerated and consume within 5 days. At room temperature, they can safely be out for a few hours but should be returned to the fridge promptly.
Can I make these cake pops dairy-free?
Yes! Use dairy-free frosting and ensure your melting chocolate or almond bark is dairy-free as well. This way, anyone with dietary restrictions can enjoy these treats.
Is it possible to use other flavors of cake mix with this method?
Definitely! This technique works wonderfully with many cake flavors like chocolate, vanilla, or lemon. Just switch out the strawberry mix and get creative with your coatings and garnishes.
Final Thoughts
This Strawberry Cake Pops Recipe is one of those magical desserts that delivers joy in every bite and is easy enough to share your love through baking. Whether you’re surprising family, hosting a party, or just craving a sweet moment, these cake pops bring smiles and compliments every time. So grab your ingredients, dive into the fun process, and treat yourself to these irresistible strawberry delights—you’ll be so glad you did!
Print
Strawberry Cake Pops Recipe
- Prep Time: 20 minutes
- Cook Time: 30 minutes
- Total Time: 1 hour 50 minutes
- Yield: 22 cake pops
- Category: Dessert
- Method: Baking
- Cuisine: American
Description
These Strawberry Cake Pops combine the fun of bite-sized treats with the delightful flavor of strawberry cake coated in creamy vanilla melting chocolate. Perfect for parties and festive occasions, they offer a colorful and delicious way to enjoy classic cake with a twist.
Ingredients
Cake Mix
- 1 package strawberry cake mix
- 1 cup water
- 1/2 cup vegetable oil or canola oil
- 3 large eggs
Frosting
- 2 tablespoons canned white, vanilla, or cream cheese frosting
Coating and Decoration
- 20 ounces vanilla melting chocolate or almond bark
- Pink or red food coloring gel (for half of the cake pops)
- Valentine’s Day sprinkles
Instructions
- Prepare the Cake: Preheat your oven according to the cake mix package instructions. In a large bowl, combine the strawberry cake mix, water, vegetable or canola oil, and eggs. Mix until smooth, then pour the batter into a greased 9×13-inch baking pan. Bake as directed on the package until a toothpick inserted in the center comes out clean.
- Cool the Cake: Remove the pan from the oven and let the cake cool completely. Cooling is essential for the cake to be handled and crumbled without falling apart.
- Crumble the Cake: Once cooled, use a fork to crumble the entire cake into fine crumbs inside a large mixing bowl, ensuring an even and fine texture.
- Add Frosting and Mix: Add 2 tablespoons of canned frosting to the cake crumbs. Mix thoroughly with your hands or an electric mixer until the mixture is moist and holds together when formed into a ball. Add a little more frosting if the mixture is too dry.
- Form Cake Balls: Roll the cake mixture into 1-inch diameter balls. Place these cake balls on a baking sheet lined with parchment paper for easy handling.
- Insert Sticks: Melt a small amount of the vanilla melting chocolate or almond bark in the microwave. Dip the tip of each cake pop stick into the melted chocolate, then insert it halfway into each cake ball. This helps the stick adhere. Place the cake pops in the refrigerator for about 1 hour to firm up.
- Color the Coating: Melt the remaining vanilla melting chocolate in the microwave. Divide it evenly into two bowls. Add pink or red food coloring gel to one bowl and stir until you achieve the desired color.
- Coat the Cake Pops: Dip each cake pop into the melted chocolate coating, ensuring it is completely covered. Scrape off any excess chocolate on the side of the bowl to avoid drips. Place dipped cake pops upright in a holder or foam base to set.
- Decorate and Chill: Before the chocolate hardens, quickly sprinkle the Valentine’s Day sprinkles over the coated cake pops for a festive finish. Allow the coating to fully set before chilling the cake pops in the refrigerator until ready to serve.
Notes
- Make sure the cake is completely cooled to avoid melting the frosting mixture.
- You can substitute cream cheese frosting for a tangier flavor.
- If the cake balls do not hold together, add a little more frosting, a teaspoon at a time.
- Use a microwave-safe bowl and melt the chocolate in short bursts, stirring in between to avoid burning.
- Store cake pops in an airtight container in the refrigerator for up to 5 days.
- Let cake pops sit at room temperature for 10 minutes before serving to bring out the best flavor and texture.
