
“`html
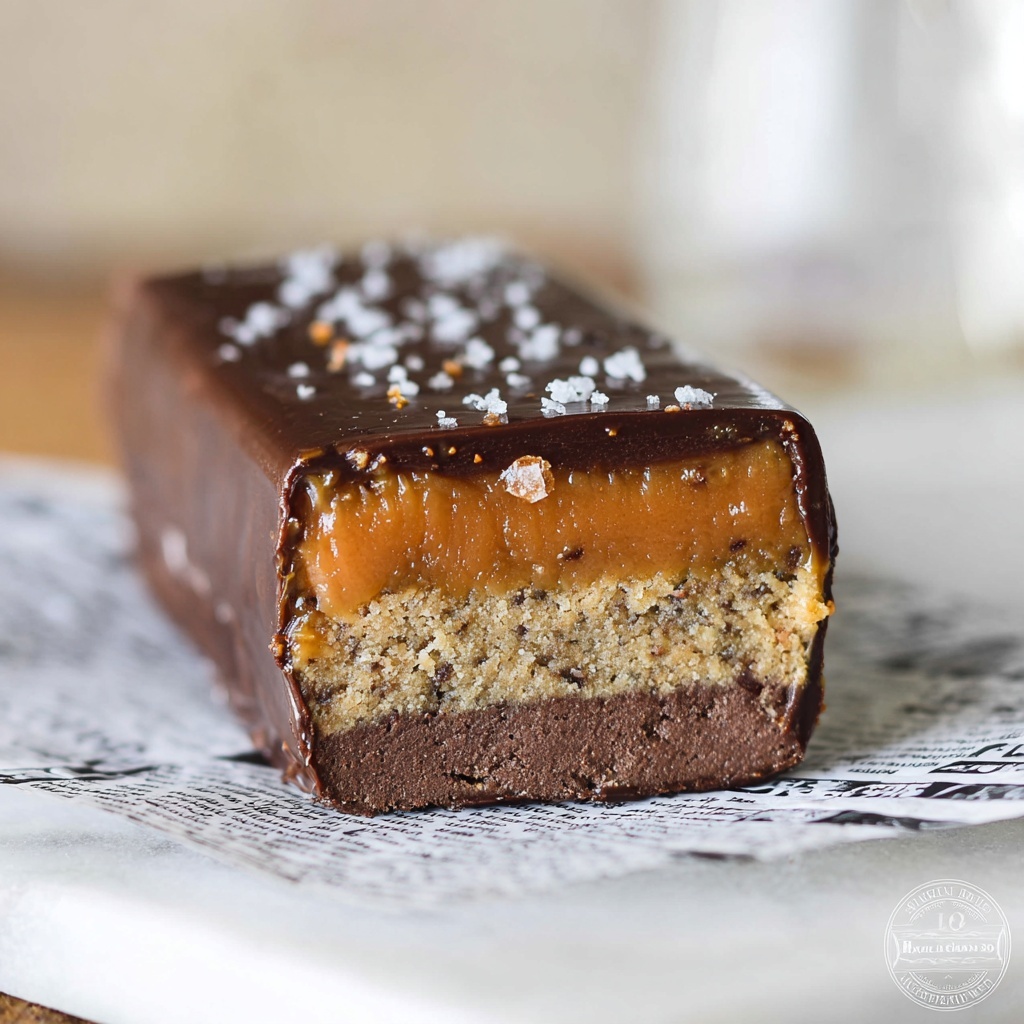
If you’re craving a delicious, energizing snack that perfectly balances indulgence and nutrition, look no further than this Chocolate Peanut Butter Protein Bars Recipe. These bars combine creamy peanut butter, rich chocolate, and a protein-packed nougat layer for a treat that’s as satisfying as it is nourishing. Whether you need a quick workout boost or a guilt-free dessert, these bars will quickly become your new favorite go-to snack.
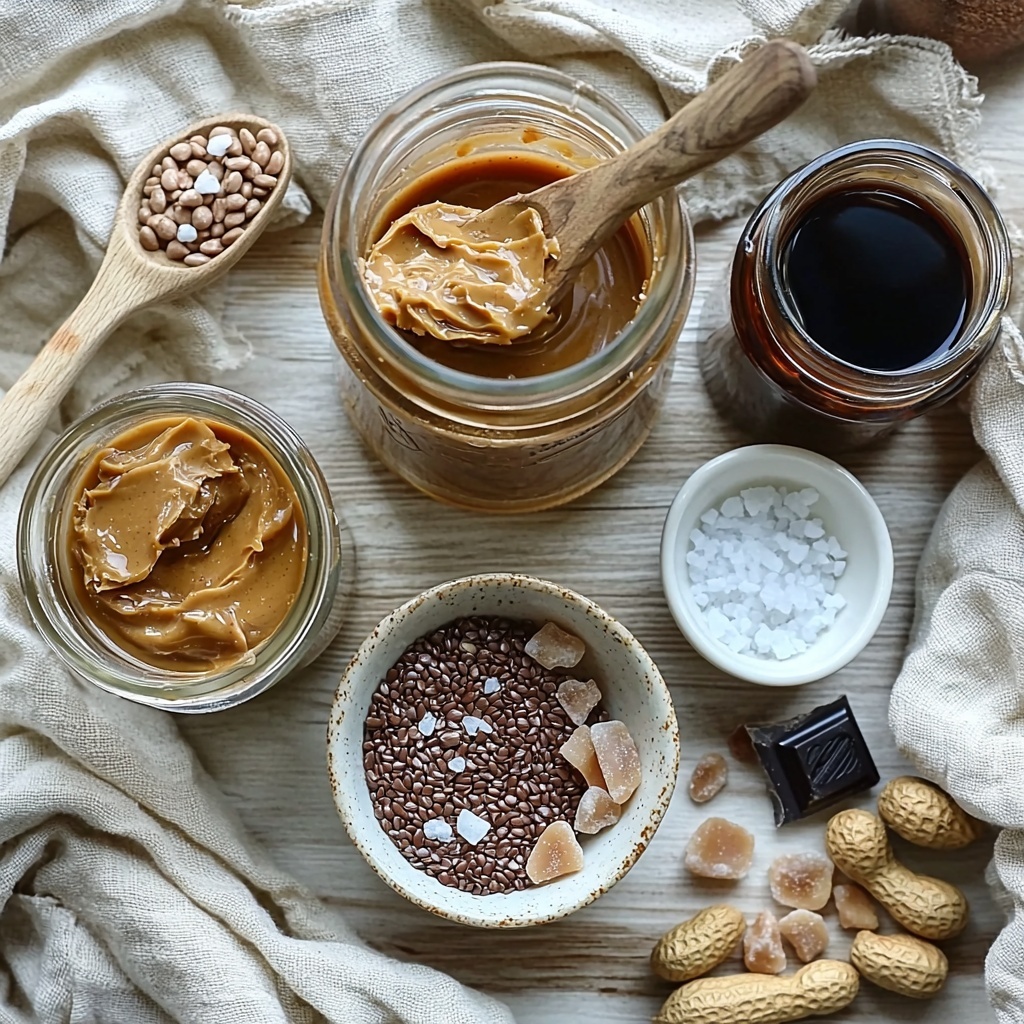
Ingredients You’ll Need
This Chocolate Peanut Butter Protein Bars Recipe uses a few simple yet essential ingredients that work harmoniously to create its iconic texture and flavor. Each component plays a crucial role, from creating a creamy nougat base to a luscious caramel layer and finally a rich chocolate coating.
- 300 g peanut butter (smooth or crunchy): Provides creaminess and that classic peanut butter flavor foundation.
- 120 ml pure maple syrup: Adds natural sweetness and helps bind the nougat mixture together gently.
- 240 ml soy milk (or other non-dairy milk): Keeps this recipe vegan-friendly while adding moisture needed for the nougat.
- 1 tablespoon vanilla extract: Enhances depth and brings warmth to the nougat layer.
- ½ teaspoon sea salt: Balances sweetness and intensifies all the flavors.
- 150 g vegan protein powder (vanilla, peanut or natural flavor): Packs these bars with the protein punch you need for energy and muscle recovery.
- 30 g ground flaxseeds (milled flaxseeds): Adds fiber and nutrients while improving the bar’s texture.
- 150 g natural peanut butter (crunchy): Used in the caramel layer, this adds texture and a deeper, richer peanut flavor.
- 150 ml pure maple syrup: Sweetens and gives that sticky, luscious caramel consistency.
- ½ teaspoon sea salt: Adds contrast to bring out the caramel’s richness.
- 250 g vegan dark chocolate: For the luscious final coating that seals all the layers in decadent perfection.
- Sea salt (for garnish): Just a pinch sprinkled on top enhances the chocolate and peanut butter’s flavors beautifully.
How to Make Chocolate Peanut Butter Protein Bars Recipe
Step 1: Prepare the Nougat Base
Start by combining 300 grams of peanut butter, 120 ml pure maple syrup, 240 ml soy milk, a tablespoon of vanilla extract, and half a teaspoon of sea salt in a large bowl. Whisk this mixture with an electric mixer until it’s luxuriously smooth and creamy. Next, gradually add the vegan protein powder, a few tablespoons at a time, and continue whisking until fully incorporated. Finally, stir in the ground flaxseeds thoroughly. This nougat layer is the heart of your bars, providing a soft yet structured base filled with flavor and protein power.
Step 2: Set the Nougat
Line an 8-inch square pan with parchment paper, covering both the base and sides to make removal easy. Transfer your nougat mixture into the pan, then cover the top with a fresh sheet of parchment paper, and press down evenly using your hands or a spoon. The top parchment keeps everything tidy and prevents sticking as the nougat layer is sticky by nature. Once shaped, place the pan into the freezer for at least one hour to firm up.
Step 3: Make the Caramel Layer
To create the rich caramel, toss the natural peanut butter, pure maple syrup, and sea salt into a heat-resistant bowl. Set this over a double boiler and stir gently until it melts and blends into a smooth, glossy caramel. The depth of natural peanut butter here brings a delightful chew and richness that perfectly complements the nougat.
Step 4: Assemble the Bars
Take the nougat out of the freezer and carefully peel off the top parchment layer. Pour the warm caramel over the chilled nougat, spreading it evenly with a spatula or spoon. Return the pan to the freezer and allow it to set completely, ideally for about four hours or even overnight for best firmness and flavor melding.
Step 5: Cut and Coat with Chocolate
Once fully set, carefully lift the layered bars out of the pan using the parchment paper edges. Cut into 18 mini bars or 12 larger ones, depending on your preference. Keep the bars cold in the freezer while you melt the vegan dark chocolate in a double boiler. Dip each bar into the melted chocolate and place on parchment paper-lined trays. Pop them into the fridge for 10 minutes to let the chocolate harden beautifully.
How to Serve Chocolate Peanut Butter Protein Bars Recipe
Garnishes
A simple sprinkle of flaky sea salt over the chocolate once it’s set instantly boosts the flavors by balancing sweetness and introducing a subtle crunch. You can also add a few crushed peanuts or a light drizzle of extra maple syrup for special occasions.
Side Dishes
These bars are nutrient-packed enough to be a standalone snack, but if you want to make it a more complete mini-meal, serve them alongside a fresh fruit salad or a creamy plant-based yogurt. Both options add freshness and contrast to the rich chocolate peanut butter flavors.
Creative Ways to Present
Try stacking the bars decoratively on a plate with small parchment round separators between layers for parties or gifting. You can also wrap them individually in wax paper tied with a rustic string for a charming homemade gift. If you’re feeling fancy, dust the plated bars with cocoa powder or edible gold dust for a glamorous touch.
Make Ahead and Storage
Storing Leftovers
Once made, store your Chocolate Peanut Butter Protein Bars in an airtight container in the freezer to maintain their texture and flavor. They stay perfectly fresh for up to one week, making it easy to enjoy these protein-packed treats whenever hunger strikes.
Freezing
If you want to keep your bars longer, freezing is ideal. Simply wrap each bar individually or keep them tightly sealed in a freezer-safe container. They thaw beautifully and can be left to defrost for about an hour at room temperature before enjoying.
Reheating
These bars are best enjoyed chilled or at room temperature, so reheating is generally unnecessary. If you prefer a slightly softer texture, remove them from the freezer and let them sit 15-20 minutes before eating, allowing the chocolate coating to soften without melting completely.
FAQs
Can I use a different type of protein powder for this recipe?
Absolutely! While vanilla, peanut, or natural-flavored vegan protein powders are recommended to complement the peanut butter and chocolate perfectly, you can experiment with your favorite plant-based blends. Just keep in mind that flavors like chocolate protein powder will change the overall taste.
Is it necessary to use soy milk, or can I substitute?
Soy milk works well because of its creamy texture and neutral flavor, but feel free to substitute any non-dairy milk you prefer—almond, oat, or cashew milk all make great alternatives without compromising the recipe’s success.
How sticky are these bars? Will they hold together well?
Thanks to the combination of peanut butter, maple syrup, and protein powder, these bars hold together beautifully but retain a soft, chewy texture. Using parchment paper when shaping and freezing ensures easy handling without sticking.
Can I make these bars nut-free?
Since peanut butter is a central ingredient, nut-free substitutions would need to be handled carefully. Sunflower seed butter might work, but it would alter the flavor and texture significantly. If allergies are a concern, this recipe might not be the best fit.
How long do these bars last once made?
Stored in an airtight container in the freezer, these bars keep their freshness and taste for up to one week. For best flavor and texture, consume within this time frame to enjoy their full chocolaty, peanut buttery goodness.
Final Thoughts
You really can’t go wrong with this Chocolate Peanut Butter Protein Bars Recipe. It’s a delightful blend of rich flavors, nourishing ingredients, and satisfying textures that makes it the perfect snack or dessert to keep in your freezer. Give it a try and watch these homemade bars become a staple in your kitchen and your heart.
“`
Print
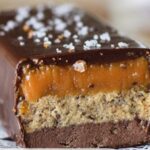
Chocolate Peanut Butter Protein Bars Recipe
- Prep Time: 20 minutes
- Cook Time: 10 minutes
- Total Time: 5 hours 30 minutes
- Yield: 18 small bars
- Category: Snack
- Method: No-Cook
- Cuisine: American
- Diet: Vegan
Description
These Chocolate Peanut Butter Protein Bars are a delicious and nutritious treat perfect for a quick energy boost or post-workout snack. Made with smooth and crunchy peanut butter, vegan protein powder, and a rich chocolate coating, these bars combine creamy nougat, smooth caramel, and a decadent chocolate layer. They are vegan-friendly and free from dairy, offering a wholesome homemade alternative to store-bought protein bars.
Ingredients
Nougat
- 300 g peanut butter (smooth or crunchy)
- 120 ml pure maple syrup
- 240 ml soy milk (or other non-dairy milk)
- 1 tablespoon vanilla extract
- ½ teaspoon sea salt
- 150 g vegan protein powder (vanilla, peanut, or natural flavor)
- 30 g ground flaxseeds (milled flaxseeds)
Caramel
- 150 g natural peanut butter (crunchy)
- 150 ml pure maple syrup
- ½ teaspoon sea salt
Coating
- 250 g vegan dark chocolate
- Sea salt (for garnish)
Instructions
- Prepare the Nougat: In a large bowl, combine peanut butter, maple syrup, soy milk, vanilla extract, and sea salt. Use an electric mixer to whisk until smooth and creamy. Gradually add the vegan protein powder, a few tablespoons at a time, whisking thoroughly to incorporate. Finally, add ground flaxseeds and mix well.
- Set the Nougat Base: Line an 8-inch square pan with parchment paper on the base and sides. Transfer the nougat mixture into the pan, then place a large sheet of parchment paper on top. Press down the mixture evenly using your hands or a spoon. The sticky texture is offset by the parchment paper, making it easy to press evenly.
- Freeze Nougat: Place the pan in the freezer and allow the nougat layer to set for at least 1 hour, keeping the parchment sheet on top until firm.
- Make the Caramel: In a heat-resistant bowl, combine natural crunchy peanut butter, maple syrup, and sea salt. Heat the mixture over a double boiler (bain-marie), stirring continuously until it melts into a smooth, homogeneous caramel.
- Assemble Caramel Layer: Carefully remove the top parchment paper from the nougat set. Pour the warm caramel evenly over the nougat layer. Use a spoon or spatula to smooth the caramel surface. Return the pan to the freezer and freeze for 4 hours or overnight for thorough setting.
- Cut the Bars: Once thoroughly set, lift the layered bars from the pan by the parchment paper. Place on a clean surface and use a sharp knife to cut into 18 small bars or 12 larger bars, depending on your preference. Place the cut bars back into the freezer while preparing the chocolate coating.
- Prepare the Chocolate Coating: Melt the vegan dark chocolate over a double boiler until smooth. One at a time, dip each protein bar into the melted chocolate, ensuring full coverage. Place the coated bars on parchment paper-lined trays.
- Set the Coating: Refrigerate the dipped bars for about 10 minutes or until the chocolate coating has hardened.
- Storage: Store the finished bars in an airtight container in the freezer. Consume them within one week for best freshness. Before serving, you can defrost the bars at room temperature for about an hour for easier eating.
Notes
- Use parchment paper both to line the pan and to press the sticky nougat mixture to prevent it from sticking to your hands or tools.
- For best results, use high-quality vegan protein powder with vanilla, peanut, or natural flavor to complement the peanut butter taste.
- The bars are best stored in the freezer and can be enjoyed cold or slightly thawed.
- You can customize the recipe by choosing either smooth or crunchy peanut butter depending on your texture preference.
- Melting chocolate over a double boiler prevents burning and ensures smooth chocolate coating.