
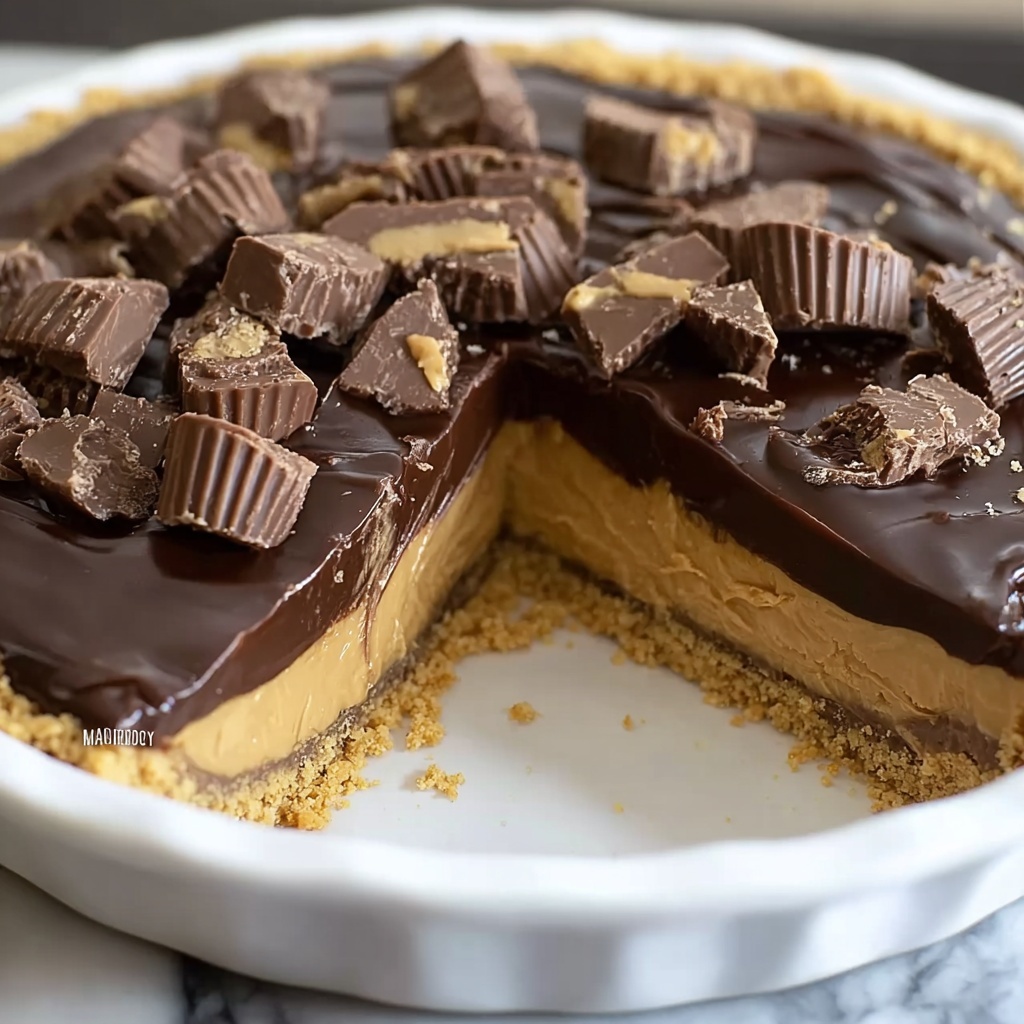
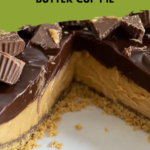
If you are a peanut butter and chocolate lover, the Giant Reese’s Peanut Butter Cup Pie Recipe is an absolute dream come true. This indulgent no-bake pie brings together a crunchy chocolate cookie crust, a luscious peanut butter filling, and a silky chocolate ganache topping—each layer bursting with familiar flavors that remind you of those classic Reese’s treats, but scaled up for sharing and celebration. Whether you’re surprising your family or impressing friends at your next gathering, this pie wraps up rich, creamy decadence with an effortless flair that will have everyone asking for seconds.

Ingredients You’ll Need
Gathering the right ingredients is half the fun and ensures this Giant Reese’s Peanut Butter Cup Pie Recipe turns out perfectly every time. Each component plays a key role: the chocolate sandwich cookies create a sturdy, chocolaty crust, the peanut butter filling brings creamy richness with just the right sweetness, and the ganache adds a glossy, smooth finish that ties everything together beautifully.
- Chocolate sandwich cookies (25-30): Choose classic Oreos or your favorite similar cookies, finely crushed to form a dense, flavorful crust.
- Unsalted butter (6 tablespoons): Melted butter binds the cookie crumbs for a firm pie base with a buttery note.
- Cream cheese (8 ounces, softened): Adds tanginess and creamy texture to balance the peanut butter’s sweetness.
- Creamy peanut butter (1 cup): Use a smooth, non-separating kind to achieve that perfect velvety peanut flavor in the filling.
- Powdered sugar (1 ½ cups, sifted): Sweetens the filling evenly while helping it set just right.
- Frozen whipped topping (8 ounces, thawed): Folded in at the end, this lightens up the filling for an airy, fluffy feel.
- Semi-sweet chocolate chips (1 cup): The essential base of the ganache that adds rich chocolate depth.
- Heavy cream (½ cup): Softens the chocolate chips and creates a smooth ganache texture.
- Vanilla extract (½ teaspoon): Enhances the chocolate flavor and rounds out the overall taste.
- Mini Reese’s peanut butter cups or chocolate shavings (optional): Perfect for decorating and adding an extra touch of peanut butter goodness.
How to Make Giant Reese’s Peanut Butter Cup Pie Recipe
Step 1: Prepare the Crust
Start by combining your finely crushed chocolate sandwich cookies with melted unsalted butter in a medium bowl. Mixing these until the crumbs are evenly coated will give you a sturdier crust. Press this mixture firmly into a 9-inch pie plate, making sure to cover the bottom and sides evenly for balanced structure. Pop it into the fridge to chill for about 15-20 minutes, which helps the crust set and hold its shape as you build the filling on top.
Step 2: Make the Peanut Butter Filling
The peanut butter filling is the creamy heart of this pie, so take a moment to whip it just right. Beat the softened cream cheese until it’s completely smooth and free of lumps. Next, add the creamy peanut butter and continue beating until fully combined, creating a consistent, luscious base. Gradually sift in the powdered sugar to avoid any clumps, then gently fold in the thawed whipped topping. Folding keeps the filling light and airy while maintaining that rich peanut butter flavor that’s absolutely irresistible.
Step 3: Assemble the Pie
With your crust chilled and filling ready, spread the peanut butter mixture evenly over the crust. Smooth the surface out nicely so it looks beautiful and inviting. Now, refrigerate for at least 1-2 hours to let the filling set firmly. This chill time ensures each slice will hold together perfectly and makes the whole dessert delightfully creamy.
Step 4: Create the Chocolate Ganache
The luxurious chocolate ganache is the final luscious layer. Combine the semi-sweet chocolate chips and heavy cream in a microwave-safe bowl, heating in short 15-second bursts. Stir between each to avoid overheating and ensure a silky texture. Once smooth and glossy, stir in the vanilla extract—it brightens the chocolate and rounds out the flavor. Let the ganache cool slightly for 10-15 minutes so it’s pourable but not too hot when layered over the pie.
Step 5: Chill and Serve Your Giant Reese’s Peanut Butter Cup Pie Recipe
Pour the cooled ganache evenly over the peanut butter filling, spreading gently to cover the surface completely. Place the pie back in the fridge for at least 4 hours or, even better, overnight. This final chill time lets the ganache fully set into a gorgeous shiny layer that slices beautifully. Serve chilled for the ultimate peanut butter and chocolate experience that everyone will love.
How to Serve Giant Reese’s Peanut Butter Cup Pie Recipe
Garnishes
Presentation is half the fun, and garnishing your pie can elevate it from delicious to show-stopping. Scatter mini Reese’s peanut butter cups or chocolate shavings on top to reinforce those classic flavors visually and texturally. You can also add a drizzle of melted peanut butter or a sprinkle of crushed cookies to create inviting texture contrasts and that extra wow factor.
Side Dishes
This pie can stand proudly on its own but pairing it with some simple sides can create a complete dessert experience. Try serving it alongside fresh whipped cream or a small scoop of vanilla ice cream to balance the richness. Fresh berries can also add a bit of brightness and freshness that wonderfully compliments the peanut butter and chocolate flavors.
Creative Ways to Present
For special occasions, slice the pie and serve it in clear dessert glasses layered with additional crushed cookies and peanut butter dollops for an elegant twist. You might also turn it into mini individual pies using cupcake liners or small ramekins, making it easier to serve guests and adding a charming touch to dessert tables.
Make Ahead and Storage
Storing Leftovers
Leftover pie should be covered tightly with plastic wrap or aluminum foil and stored in the refrigerator. It will remain fresh and delicious for up to 4-5 days. Keeping it chilled preserves the texture of the filling and ganache, so each bite tastes just as heavenly as the first.
Freezing
You can freeze slices of this Giant Reese’s Peanut Butter Cup Pie Recipe for longer storage. Wrap individual slices or the whole pie carefully in plastic wrap, then in foil, and place in an airtight container. Freeze for up to 2 months. When ready to enjoy, thaw overnight in the refrigerator for the best texture.
Reheating
This pie is best served cold, so reheating is generally not necessary. If you prefer a softer texture, simply allow refrigerated slices to sit at room temperature for about 15-20 minutes before serving to bring out those flavors without melting the ganache completely.
FAQs
Can I use natural peanut butter in this pie?
It’s best to use creamy, non-separating peanut butter to achieve the smoothest, creamiest filling. Natural peanut butter tends to have oil separation that can affect the texture and consistency of the filling.
Can I make this pie gluten-free?
Yes! Substitute the chocolate sandwich cookies with your favorite gluten-free chocolate cookies to create a gluten-free crust without compromising the flavor or texture.
How long will the pie stay fresh in the fridge?
This pie will stay fresh for up to 4-5 days when properly stored in the refrigerator, covered tightly to prevent any absorption of other flavors.
Is it necessary to chill the pie overnight?
While chilling for at least 4 hours works well, letting the pie chill overnight produces an even firmer set, making slicing cleaner and enhancing the flavors as they meld together.
Can I make the pie ahead for a party?
Absolutely! This Giant Reese’s Peanut Butter Cup Pie Recipe is perfect for making a day or two ahead. It tastes even better after resting, so prepare it in advance and keep refrigerated until serving.
Final Thoughts
If you’re craving a dessert that’s both nostalgic and elegantly simple to prepare, the Giant Reese’s Peanut Butter Cup Pie Recipe is your new go-to indulgence. Rich, creamy, and full of that perfect peanut butter and chocolate harmony, it’s guaranteed to be a crowd-pleaser at any event. Trust me, once you try it, this pie will become a favorite that you’ll want to whip up again and again.
Print
Giant Reese’s Peanut Butter Cup Pie Recipe
- Prep Time: 15 minutes
- Cook Time: 0 minutes
- Total Time: 4 hours 15 minutes (including chilling time)
- Yield: 8 servings
- Category: Dessert
- Method: No-Cook
- Cuisine: American
Description
This Giant Reese’s Peanut Butter Cup Pie is a decadent no-bake dessert featuring a chocolate sandwich cookie crust, creamy peanut butter filling, and a rich chocolate ganache topping. Perfect for peanut butter lovers, this pie combines smooth cream cheese and peanut butter, lightened with whipped topping, and is garnished with optional Reese’s mini cups or chocolate shavings for extra indulgence.
Ingredients
For the Crust:
- 25–30 chocolate sandwich cookies (e.g., Oreos), finely crushed
- 6 tablespoons unsalted butter, melted
For the Peanut Butter Filling:
- 1 (8 ounce) package cream cheese, softened
- 1 cup creamy peanut butter (not natural separating kind)
- 1 ½ cups powdered sugar, sifted
- 1 (8 ounce) container frozen whipped topping, thawed (e.g., Cool Whip)
For the Chocolate Ganache:
- 1 cup (about 6 ounces) semi-sweet chocolate chips
- ½ cup heavy cream
- ½ teaspoon vanilla extract
Optional Garnish:
- Mini Reese’s peanut butter cups or chocolate shavings
Instructions
- Prepare the Crust: In a medium bowl, combine the finely crushed chocolate sandwich cookies with the melted unsalted butter. Mix until the crumbs are evenly coated with butter. Press the mixture firmly into the bottom and up the sides of a 9-inch pie plate to form a crust. Chill the crust in the refrigerator for 15-20 minutes to set.
- Make the Peanut Butter Filling: Beat the softened cream cheese in a large bowl until smooth and creamy. Add the creamy peanut butter and continue beating until fully combined and smooth. Gradually add the sifted powdered sugar and beat until smooth and no lumps remain. Gently fold in the thawed frozen whipped topping until just combined and no streaks remain, creating a light, airy filling.
- Assemble the Pie: Spread the prepared peanut butter filling evenly into the chilled cookie crust. Smooth the surface with a spatula. Cover and refrigerate the pie for 1 to 2 hours so the filling firms up and sets properly.
- Create the Chocolate Ganache: Place the semi-sweet chocolate chips and heavy cream in a microwave-safe bowl. Microwave the mixture in 15-second intervals, stirring well after each interval, until the chocolate is fully melted and the mixture is smooth and glossy. Stir in the vanilla extract to enhance the flavor. Allow the ganache to cool slightly for 10-15 minutes so it thickens but is still pourable.
- Chill and Serve: Pour the cooled ganache evenly over the chilled peanut butter filling, spreading gently with a spatula to cover the surface. Refrigerate the completed pie for at least 4 hours, or preferably overnight, to allow the ganache to fully set. Before serving, optionally garnish with mini Reese’s peanut butter cups or chocolate shavings for an extra festive touch. Serve the pie chilled for best texture and flavor.
Notes
- Use a creamy, non-natural peanut butter to avoid separating or grainy texture in the filling.
- Be sure to sift the powdered sugar to prevent lumps in the filling.
- If you don’t have a microwave, you can gently melt the chocolate chips and cream together in a heatproof bowl over a pot of simmering water (double boiler method).
- The pie is best served chilled and can be stored in the refrigerator for up to 3 days.
- To make cutting easier, allow the pie to chill overnight to fully firm up.


