
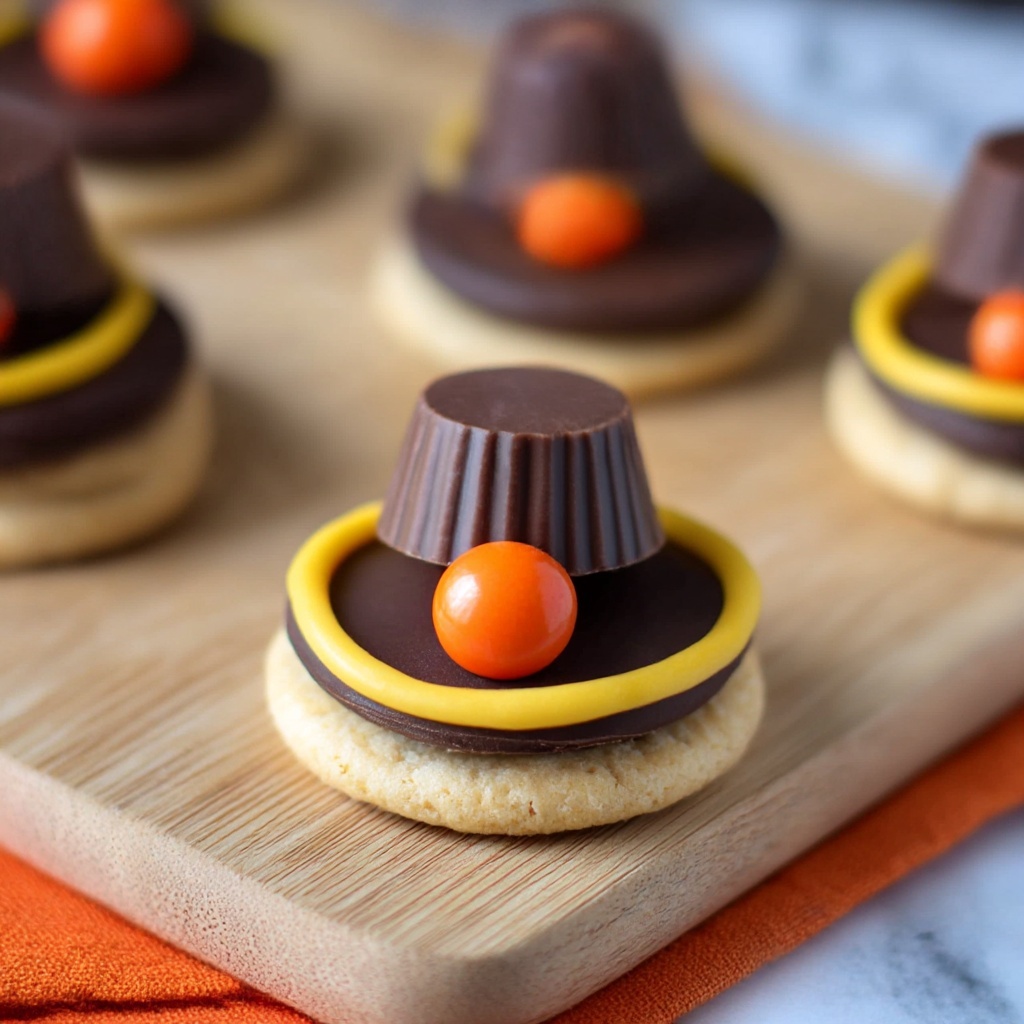
If you’ve been looking for a charming dessert that brings a nostalgic twist to your holiday table, the Pilgrim Hat Cookies Recipe is exactly what you need. These delightful little treats capture the spirit of Thanksgiving in a fun and delicious form, combining crunchy fudge stripe cookies, creamy peanut butter cups, and colorful orange-yellow frosting to create a feast for both the eyes and the taste buds. They’re simple to make but packed with personality, perfect for sharing with family or surprising guests with a sweet nod to tradition.
Ingredients You’ll Need
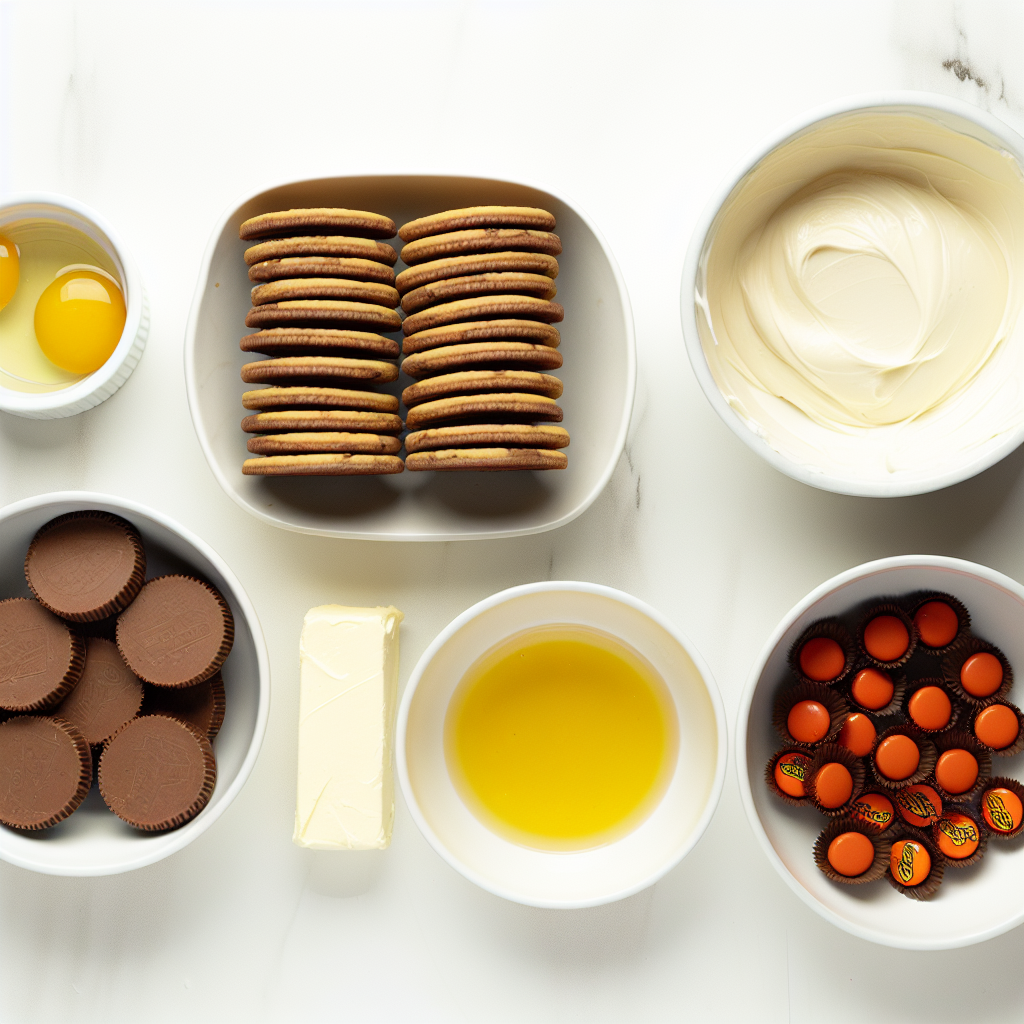
Getting the right ingredients is the key to nailing this Pilgrim Hat Cookies Recipe. Each component plays a crucial role — from the stripe in the cookie mimicking the hatband to the peanut butter cups adding that rich, creamy texture and the frosting bringing in vibrant color and sweetness.
- 24 Fudge Stripe Cookies: These form the perfect base, with their chocolate stripes adding both texture and visual appeal.
- 24 Mini Reese’s Peanut Butter Cups (unwrapped): The star of the hat, these add an irresistible, creamy peanut butter center.
- 1/2 cup yellow/orange frosting: This acts as the “glue” and decorative rim, giving the hat its authentic look and a pop of color.
- 24 Reese’s Pieces: Small candy accents that work beautifully as the buckle on your pilgrim hat.
How to Make Pilgrim Hat Cookies Recipe
Step 1: Prepare the Cookie Base
Begin by laying out your fudge stripe cookies with the chocolate side facing up on a clean board or surface. This chocolate side will serve as the base of your pilgrim hat and gives it that classic dark look that’s essential.
Step 2: Pipe the Frosting Rim
Next, take your yellow or orange frosting and pipe a circle around the center of each cookie, roughly the size of a peanut butter cup. This frosting circle will act as the brim of your pilgrim hat, so don’t be shy making it neat and even—it’s the frame for the next step.
Step 3: Add the Peanut Butter Cup
Now place the mini Reese’s peanut butter cup upside down right in the center of the frosting circle. Press down gently but firmly, allowing the frosting to form a natural rim or brim around the base of the cup, mimicking the crown of the pilgrim hat.
Step 4: Attach the Buckle Candy
Select a Reese’s Pieces candy of the color opposite to your frosting—so if you piped orange frosting, grab a yellow piece, or vice versa. Press this candy gently on the frosting edge to mimic a cute buckle on the hat. If the frosting isn’t quite tall enough to hold it securely, dab a tiny bit of frosting under the candy to help it stick well.
Step 5: Let It Set
Finally, give the cookies about an hour to let the frosting set completely. This wait helps everything firm up nicely so your pilgrim hats keep their shape and look freshly made when you serve.
How to Serve Pilgrim Hat Cookies Recipe
Garnishes
For a festive touch, sprinkle a dash of powdered sugar or edible glitter around your serving platter to create a subtle sparkle. You might also add some small edible autumn leaves or cinnamon sticks nearby to enhance the seasonal vibe.
Side Dishes
These cookies pair wonderfully with warm drinks. A cup of spiced apple cider, creamy hot chocolate, or your favorite coffee will complement the sweet and nutty flavors perfectly, making your dessert table feel cozy and inviting.
Creative Ways to Present
Try arranging your Pilgrim Hat Cookies Recipe on a rustic wooden tray or a vintage platter to enhance their old-time charm. You could also use a decorative cake stand, placing autumn leaves or miniature pumpkins around it to create a full-on harvest season display that guests will adore.
Make Ahead and Storage
Storing Leftovers
If you have leftovers, these cookies store beautifully in an airtight container at room temperature. They’ll stay fresh for about 3 to 4 days, maintaining their delightful texture and flavor for snacking later.
Freezing
While these cookies are best enjoyed fresh, you can freeze them for up to a month. Arrange them in a single layer on a baking sheet to freeze initially, then transfer to an airtight container or freezer bag. Thaw at room temperature before serving to ensure the frosting and peanut butter cups soften back to perfect enjoyment.
Reheating
No need to reheat these cookies since they’re perfect at room temperature. If you want to warm your accompanying drink or just enjoy the cookies with a personal twist, have them alongside a warm beverage to enhance their comforting flavors.
FAQs
Can I use other types of cookies instead of fudge stripe cookies?
Absolutely! While fudge stripe cookies create the ideal “hat” base due to their shape and stripes, you can experiment with other round chocolate cookies if needed. Just make sure they’re sturdy enough to hold the peanut butter cup and frosting without breaking.
What if I don’t have Reese’s Pieces or mini peanut butter cups?
You can get creative! Small peanut butter candies or even chocolate-covered peanut butter bits can substitute nicely. The key is to have that creamy peanut butter center for the hat crown and a bright candy for the buckle detail.
Is this Pilgrim Hat Cookies Recipe suitable for kids?
Definitely! This recipe is fun and simple enough for kids to help assemble, plus the colors and shapes capture their attention. Just be mindful of small candy pieces if very young children are involved to avoid choking hazards.
Can I make these cookies in advance for a party?
Yes, these cookies actually benefit from a bit of sitting time to let the frosting set properly. Making them a few hours or even a day before your event will ensure they hold their shape and look picture-perfect when it’s time to serve.
What frosting should I use for this Pilgrim Hat Cookies Recipe?
Use a thick, spreadable yellow or orange frosting like a buttercream or a sturdy store-bought option. It needs to hold its shape around the peanut butter cup, so avoid runny or thin frostings for the best results.
Final Thoughts
I can’t recommend this Pilgrim Hat Cookies Recipe enough for adding a splash of creativity and joy to your holiday celebrations. They’re quick to put together, visually charming, and absolutely delicious — a perfect recipe to share with loved ones while making sweet memories. So why not gather your ingredients and start crafting these edible little hats? Your friends and family will be asking for them every year!
Print
Pilgrim Hat Cookies Recipe
- Prep Time: 20 minutes
- Cook Time: 0 minutes
- Total Time: 20 minutes
- Yield: 24 cookies
- Category: Dessert
- Method: No-Cook
- Cuisine: American
Description
A fun and festive no-bake treat perfect for Thanksgiving celebrations, Pilgrim Hat Cookies are made by decorating fudge stripe cookies with peanut butter cups, colorful frosting, and Reese’s Pieces to resemble traditional pilgrim hats.
Ingredients
Ingredients
- 24 Fudge Stripe Cookies
- 24 Mini Reese’s Peanut Butter Cups (unwrapped)
- 1/2 cup yellow or orange frosting
- 24 Reese’s Pieces candies
Instructions
- Arrange Cookies: Lay out the 24 fudge stripe cookies with the chocolate striped side facing up on a flat surface or board to prepare for decorating.
- Pipe Frosting: Using a piping bag or knife, apply a circle of frosting around the center of each cookie. The circle should be about the size of a mini Reese’s peanut butter cup.
- Place Peanut Butter Cup: Carefully position an unwrapped mini peanut butter cup upside down in the center of the frosting circle on each cookie, pressing down lightly to create a smooth frosting rim around the base of the cup.
- Add Buckle Decoration: Select a Reese’s Pieces candy that contrasts the color of the frosting (e.g., orange candy on yellow frosting). Place this candy onto the edge of the peanut butter cup to mimic a hat buckle. If needed, use a tiny dab of frosting to secure the candy in place.
- Set Frosting: Allow the decorated cookies to sit for about an hour so the frosting can set firmly before serving.
Notes
- Use a piping bag or small spoon for neat frosting application.
- The choice of frosting color (yellow or orange) can be customized to suit your preference or theme.
- Make sure the peanut butter cups are unwrapped before assembly to avoid any messy wrapping.
- Allowing the frosting to set helps the decorations hold better during serving or transport.
- This recipe is child-friendly and a great activity to do with kids around Thanksgiving.


