

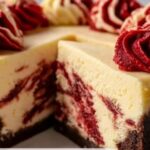
If you’re looking for a show-stopping dessert that combines the classic charm of red velvet with the creamy decadence of cheesecake, you’re in for a real treat with this Red Velvet Cheesecake Swirl Cake Recipe. Imagine moist, tender cake layers in that iconic deep red hue, beautifully marbled with luscious cheesecake swirls that add a velvety texture and a tangy twist. It’s absolutely irresistible, effortlessly elegant, and perfect for any celebration or just a cozy weekend indulgence.
Ingredients You’ll Need
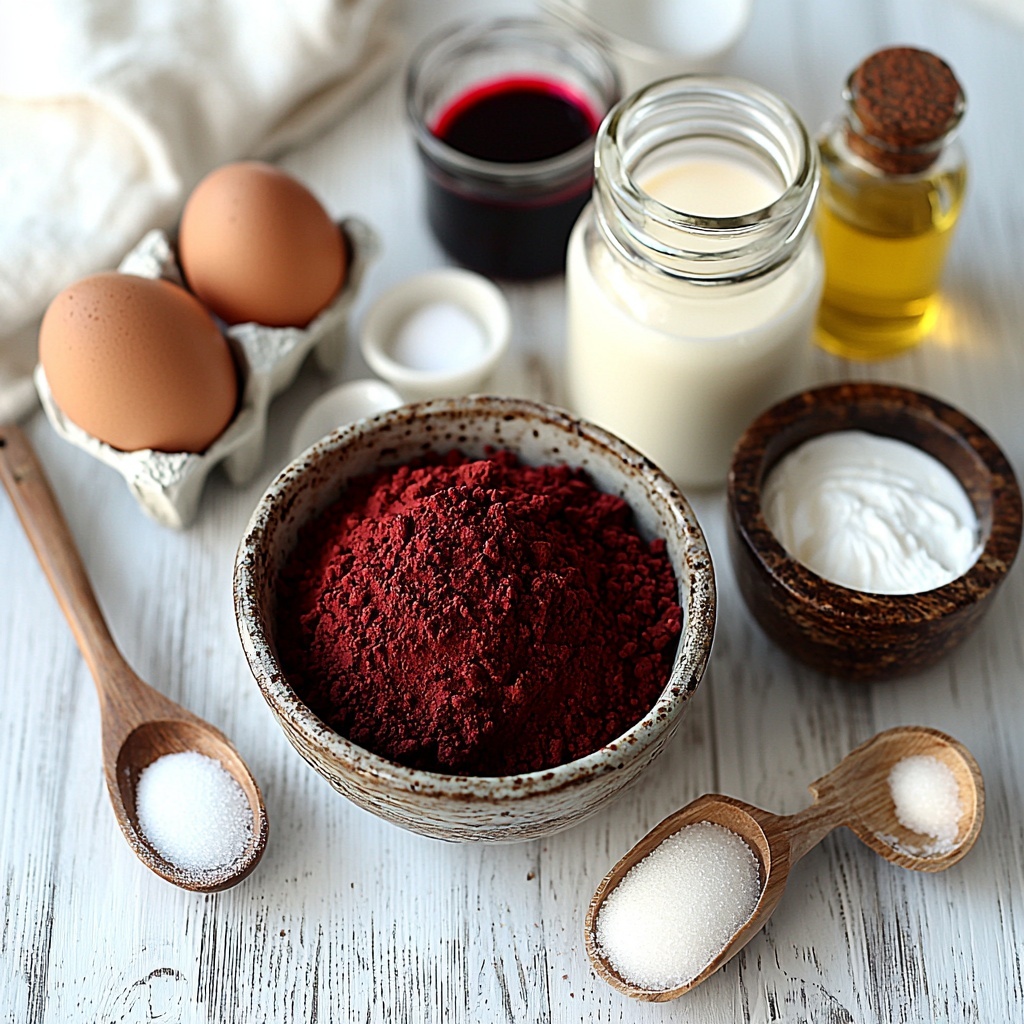
These ingredients are straightforward but thoughtfully chosen to give the cake its signature flavor, texture, and stunning appearance. Each one plays a crucial role, from the tangy buttermilk tenderizing the cake to the rich cream cheese creating those gorgeous, creamy swirls.
- 2 ½ cups all-purpose flour: The foundation for a soft and fluffy cake crumb.
- 1 ½ cups granulated sugar: Adds the perfect amount of sweetness and helps with moisture retention.
- 2 tablespoons unsweetened cocoa powder: Gives the cake its subtle chocolate undertone without overpowering the red velvet flavor.
- 1 teaspoon baking soda: Acts as a leavening agent to make the cake light and airy.
- ½ teaspoon salt: Enhances all the flavors, balancing the sweetness perfectly.
- 1 cup buttermilk: Adds moistness and a slight tang that complements the cream cheese beautifully.
- 1 cup vegetable oil: Keeps the cake super moist and tender.
- 2 large eggs: Bind everything together and add richness.
- 1 teaspoon white vinegar: Reacts with the baking soda for lift and enhances the red velvet’s delicate tang.
- 1 tablespoon red food coloring: For that iconic and vibrant red color that catches the eye.
- 16 ounces cream cheese (room temperature): For the creamy and tangy swirl that makes this cake unforgettable.
- 1 ½ cups powdered sugar: Sweetens the cheesecake mixture without graininess.
- 2 teaspoons vanilla extract: Adds a lovely depth and aroma to both the cake and cheesecake swirl.
How to Make Red Velvet Cheesecake Swirl Cake Recipe
Step 1: Prepare the Pans and Preheat the Oven
Start by greasing and lining two 9-inch round cake pans with parchment paper. This step is crucial because it ensures your beautiful cake layers will come out easily and keep their shape. Preheat your oven to 350°F (175°C) so it’s perfectly ready when your batter is mixed.
Step 2: Mix Dry Ingredients
In a large mixing bowl, whisk together the all-purpose flour, granulated sugar, cocoa powder, baking soda, and salt. This combination forms the dry base that gives the cake its structure and subtle chocolate flavor. Whisking ensures there are no lumps and the ingredients are evenly distributed.
Step 3: Combine Wet Ingredients
In a separate bowl, whisk the buttermilk, vegetable oil, eggs, white vinegar, vanilla extract, and red food coloring until fully blended. This mixture adds moisture, richness, and that trademark red velvet tang with vibrant coloring that makes this cake so special.
Step 4: Blend the Mixtures
Slowly add the wet ingredients to the dry, mixing gently until the batter is smooth and velvety. Avoid overmixing to keep the cake tender. The consistency should be thick but pourable—ready for the magic cheesecake swirl!
Step 5: Prepare Cheesecake Swirl
Beat the cream cheese on its own until completely smooth to avoid any lumps. Gradually add the powdered sugar and vanilla extract, whipping the mixture until it’s fluffy and creamy. This luscious cheesecake filling is what will create the stunning swirl effect and add that irresistible richness.
Step 6: Layer and Swirl the Batter
Divide the red velvet batter evenly between the two prepared pans. Then, spoon dollops of the cheesecake mixture evenly over each layer. Using a knife or skewer, gently swirl the cheesecake filling into the cake batter to create beautiful marbled patterns. This step is where your cake really starts to dazzle!
Step 7: Bake and Cool
Bake your cake layers for 30-35 minutes, or until a toothpick inserted in the center comes out clean. Once baked, let the cakes cool in the pans for 10 minutes, then carefully transfer them to wire racks to cool completely. Patience here pays off with perfectly set layers ready to be frosted.
Step 8: Frosting and Decoration
Use any remaining cheesecake mixture to frost the top of your cooled cake layers. Spread and swirl it decoratively for an elegant finish that complements the swirl inside. This final touch brings the Red Velvet Cheesecake Swirl Cake Recipe full circle, making it as beautiful as it is delicious.
How to Serve Red Velvet Cheesecake Swirl Cake Recipe
Garnishes
A dusting of powdered sugar, fresh berries, or edible rose petals can elevate the presentation instantly. You might also sprinkle some finely chopped pecans or white chocolate shavings on top to add texture and a little crunch to each bite.
Side Dishes
Serve with a dollop of freshly whipped cream or a scoop of vanilla bean ice cream for extra indulgence. A hot cup of coffee or a rich cappuccino complements the creamy tang and sweetness fantastically, turning it into an unforgettable dessert experience.
Creative Ways to Present
Cut the cake into neat squares and serve on a decorative platter for a party, or stack layers for an elegant multi-tiered centerpiece. For a fun twist, turn the leftover cake into trifle or layered parfaits with berries and whipped cream, making the Red Velvet Cheesecake Swirl Cake Recipe versatile beyond the traditional slice.
Make Ahead and Storage
Storing Leftovers
Store any leftover cake in an airtight container in the refrigerator, where it will stay fresh and delicious for 3-4 days. This ensures the cheesecake swirl stays creamy and the cake maintains its moistness without drying out.
Freezing
This cake freezes beautifully! Wrap individual slices or whole layers tightly in plastic wrap, then place in a freezer-safe container. Freeze for up to 1 month. When ready to enjoy, thaw in the refrigerator overnight for the best texture and flavor.
Reheating
Since this is a moist, cream cheese-filled cake, it’s best enjoyed chilled or at room temperature. If you prefer it slightly warmed, gently microwave a slice for about 15 seconds, but be careful not to melt the cream cheese swirl.
FAQs
Can I use a different type of food coloring?
Absolutely! Gel food coloring works very well because it adds vibrant color without thinning the batter. You can also experiment with natural red colorings like beet juice, but the shade might be less intense.
Is it necessary to use buttermilk?
Buttermilk provides the cake with moisture and tanginess that balances the sweetness. If you don’t have buttermilk, you can make a substitute by adding 1 tablespoon of white vinegar or lemon juice to 1 cup of milk and letting it sit for 5 minutes.
Can I make this cake dairy-free?
Dairy-free adaptations require careful substitutions. Use dairy-free cream cheese and a non-dairy milk with vinegar as a buttermilk alternative. The texture and flavor might vary slightly, but it’s definitely possible!
How do I ensure the cheesecake swirl doesn’t sink?
Make sure your cream cheese is room temperature and the batter isn’t too thin. Swirling gently rather than stirring aggressively helps keep the cheesecake suspended beautifully within the red velvet layers.
Can I double this recipe for a larger cake?
Yes, doubling the recipe works well if you have bigger pans or want more layers. Just be sure to adjust baking time as needed and check with a toothpick for doneness.
Final Thoughts
This Red Velvet Cheesecake Swirl Cake Recipe is truly a crowd-pleaser that strikes the perfect balance between classic and luxe. Whether you’re celebrating a special occasion or just craving something sweet and comforting, this cake delivers every time. I can’t wait for you to try it and discover how easy and rewarding it is to create such a stunning dessert at home!
Print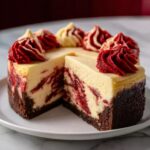
Red Velvet Cheesecake Swirl Cake Recipe
- Prep Time: 25 minutes
- Cook Time: 35 minutes
- Total Time: 1 hour
- Yield: 10 servings
- Category: Dessert
- Method: Baking
- Cuisine: American
Description
This Red Velvet Cheesecake Swirl Cake combines the classic moist and tender red velvet cake with a luscious, creamy cheesecake swirl, creating a visually stunning and delicious dessert perfect for any celebration or special occasion.
Ingredients
Dry Ingredients
- 2 ½ cups all-purpose flour
- 1 ½ cups granulated sugar
- 2 tablespoons unsweetened cocoa powder
- 1 teaspoon baking soda
- ½ teaspoon salt
Wet Ingredients
- 1 cup buttermilk
- 1 cup vegetable oil
- 2 large eggs
- 1 teaspoon white vinegar
- 1 tablespoon red food coloring
- 2 teaspoons vanilla extract
Cheesecake Swirl & Frosting
- 16 ounces cream cheese (room temperature)
- 1 ½ cups powdered sugar
- 2 teaspoons vanilla extract
Instructions
- Prepare the Pans: Grease and line two 9-inch round cake pans with parchment paper to ensure the cakes release easily after baking.
- Preheat Oven: Set your oven to 350°F (175°C) so it reaches the right temperature for even baking.
- Mix Dry Ingredients: In a large bowl, whisk together the all-purpose flour, granulated sugar, unsweetened cocoa powder, baking soda, and salt until fully combined.
- Combine Wet Ingredients: In a separate bowl, whisk together the buttermilk, vegetable oil, eggs, white vinegar, vanilla extract, and red food coloring until smoothly blended.
- Blend the Mixtures: Gradually add the wet ingredients to the dry ingredients, mixing until the batter is smooth and uniform in color.
- Prepare Cheesecake Swirl: Beat the cream cheese in a bowl until smooth; gradually add powdered sugar and vanilla extract, whipping until the mixture is light and fluffy.
- Layer the Batter: Divide the red velvet batter evenly between the prepared cake pans. Drop spoonfuls of the cheesecake mixture on top of the batter, then gently swirl using a skewer or knife to create a marbled effect.
- Bake: Place the pans in the preheated oven and bake for 30-35 minutes, or until a toothpick inserted into the center comes out clean.
- Cooling Time: Remove the cakes from the oven and let them cool in the pans for 10 minutes. Then transfer to wire racks to cool completely to room temperature.
- Frosting & Decoration: Use the remaining cheesecake mixture to frost the cooled cakes, applying it evenly on top and around the sides. Create decorative swirls with a spatula for an elegant finish.
Notes
- Make sure the cream cheese is at room temperature for smooth mixing.
- Use gel food coloring for a richer red color without altering batter consistency.
- Allow cakes to cool completely before frosting to prevent melting.
- A toothpick test ensures the cakes are baked through without overbaking.
- This cake can be stored in the refrigerator for up to 3 days.

